One Day Build: Expense Tracking
For a long time I’ve struggled to find a simple and good expense tracker. I’ve tried several different apps, most recently Wallet and before that, Settle Up. All of the apps I’ve tried worked fine, but usually felt too complicated, lacked some fundamental feature that I wanted, or simply was just too clunky or buggy.
Furthermore, one of my main requirements is shared expense tracking. I use Android and my wife uses iPhone so we want something that works cross-platform so that we can track our expenses together.
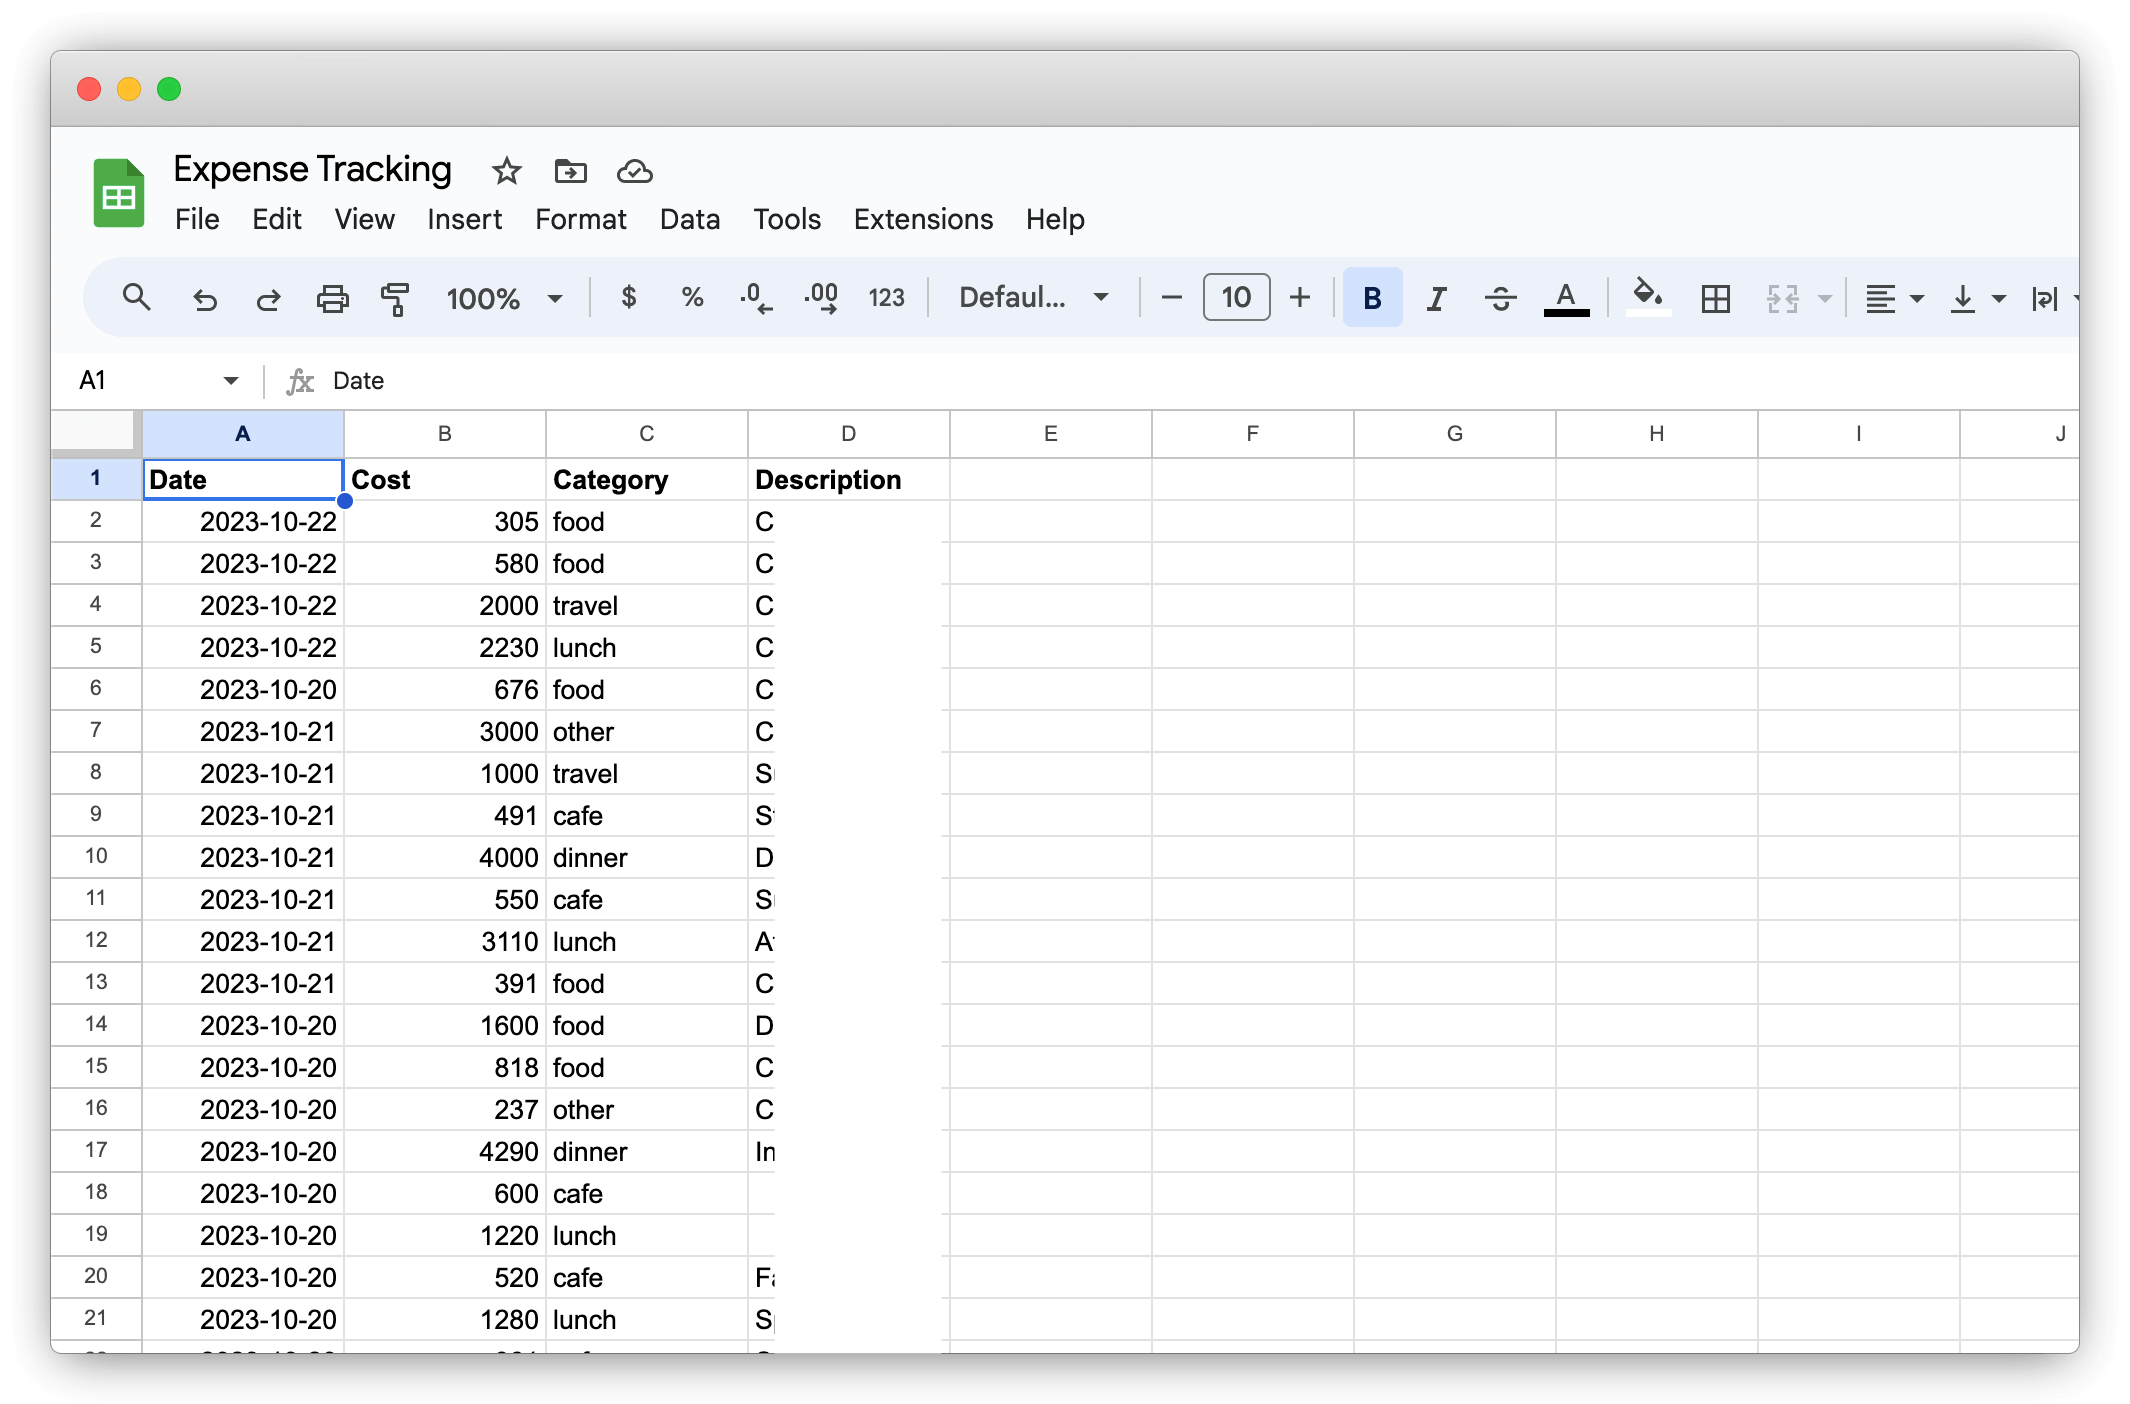
Another thing I really dislike about most expense tracking apps is that the data ends up difficult to access. I love having my data stored in spreadsheets since it makes it super easy to go through and fix things or analyze the data.
Recently, while being back in Tokyo, I initially considered continuing using Wallet, however, when I realized that the app doesn’t supporting changing the main display (base) currency, I finally gave up on that app.
Problem
Instead, I set up a simple Google Sheet, and started using that as my expense tracker. However, even on desktop it’s a bit too clunky to use. I want new data to be entered from the top since I don’t want to have to scroll down to the bottom every time. So, this means right-clicking, adding a new row, and then inserting the new data. On a phone this is even more cumbersome.
Ever since we first started tracking our expenses, we quickly realized that the best habit is to add your expenses immediately as they occur, so we don’t forget later. So, it’s important for us to be able to log our expenses easily and quickly on the go.
During the first couple of days with the spreadsheet I started by writing down expenses in a note on my phone, and then at the end of the day I’d sync the data with the spreadsheet. However, after a couple of days of doing this I decided to find a better solution.
Solution
It was time to build something, and I spent one evening creating a simple PWA (progressive web app) that takes new expense data and adds the data to my spreadsheet.
Web-based for cross-platform
A web based app is by-far the easiest way of creating a cross-platform MVP that works on Desktop, Android and iOS. It is a million times less work than trying to create a native app for each platform, or even using something like React Native. It’s not going win any awards for fancy animations or performance, but it will definitely get the job done.
Also, the fact that I can push new updates via a simple deploy to my server is a huge advantage, instead of having to go through all the tedious packaging, update and review processes associated with app stores.
Furthermore, web technologies have become very powerful, and operating systems are slowly but steadily embracing them as well (even iOS!). For a while now I’ve been eager to dive deeper into PWA technologies, like Web Push. I remember reading recently that PWAs on iOS now finally support notifications via Web Push, so this was something I wanted to learn more about.
Spreadsheets-as-a-Database
Using Google Sheets as my “data store” keeps the data portable. Even if I decide to stop using the app in the future, the data will still be easily accessible, and not hidden away in an app or database. Also, collaboration, sync, and versioning is already solved with this approach!
Putting ChatGPT to the test
Another goal was to take this opportunity to test using ChatGPT (free version) for a new project. I wanted to see how far ChatGPT would be able to help me with this project, and learn a bit more about what I like and dislike about ChatGPT.
Implementation
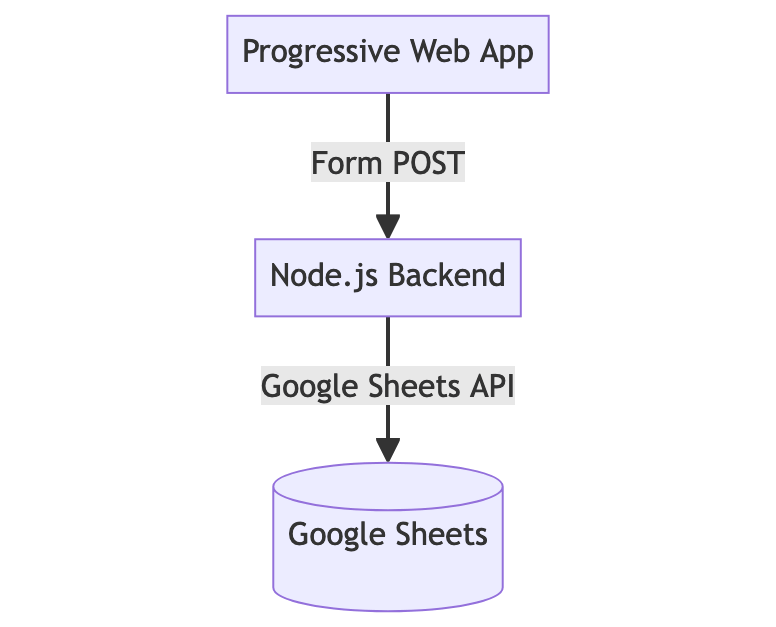
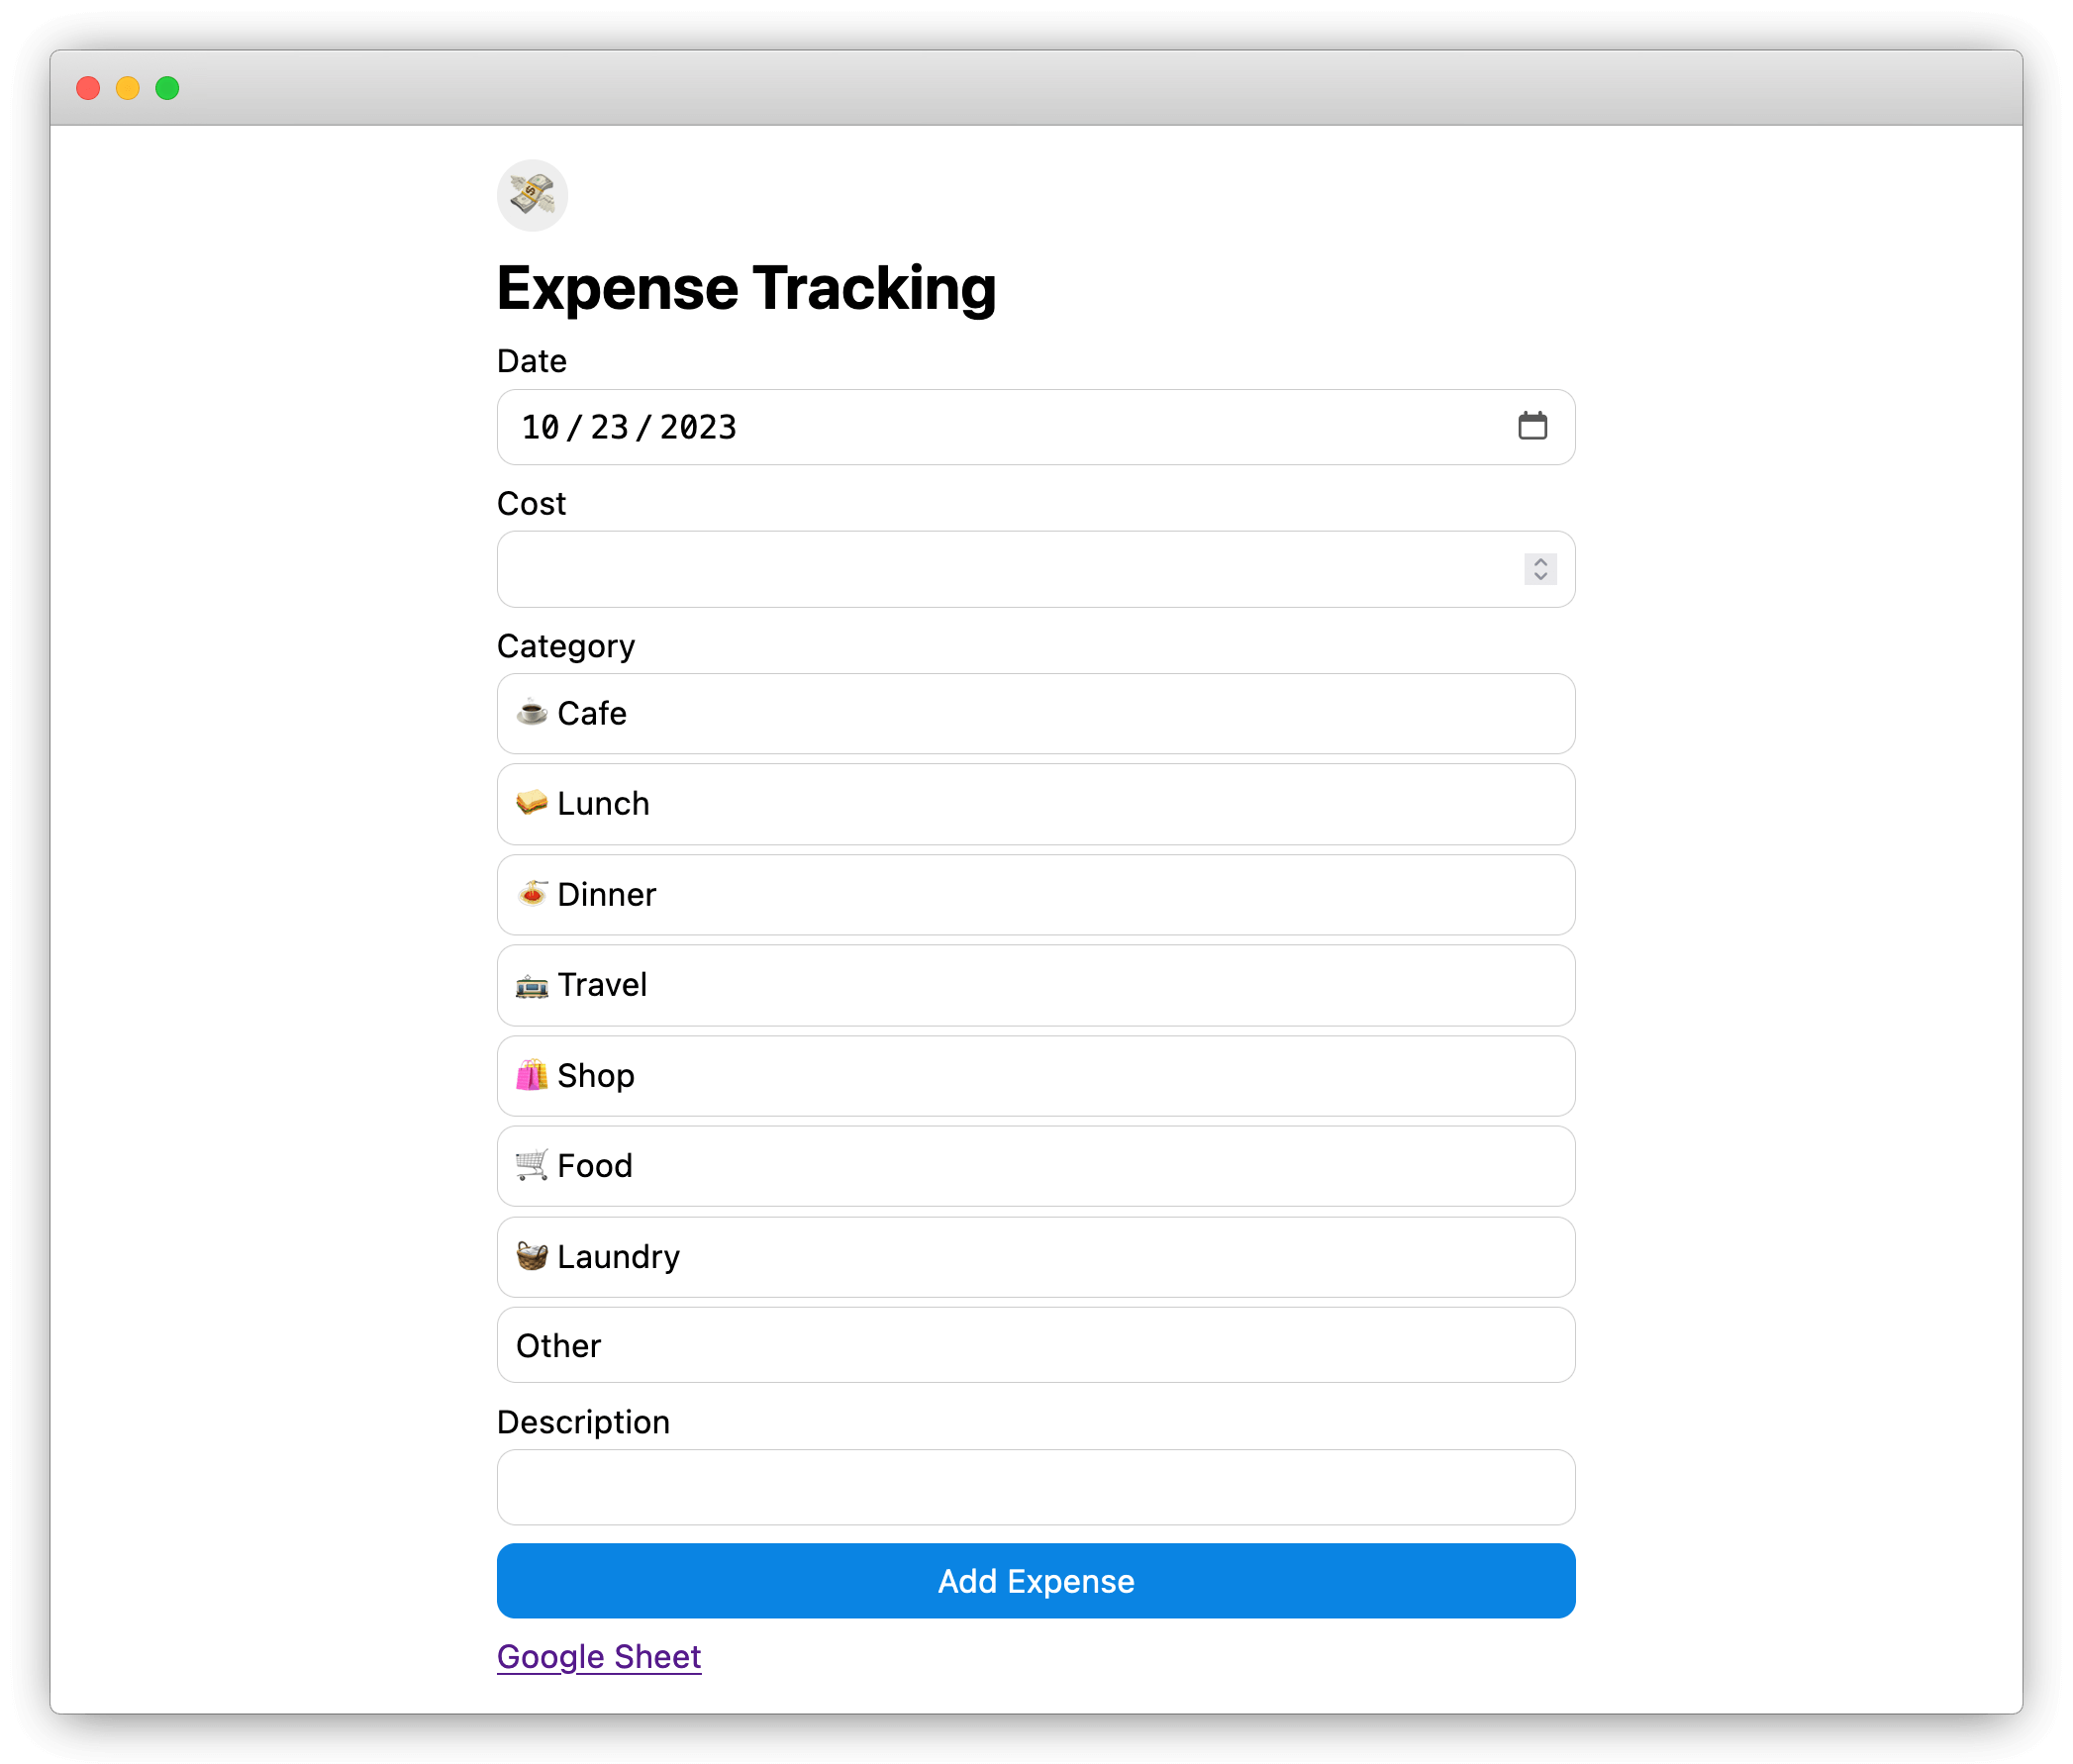
The app itself is pretty straightforward, consisting of:
- A simple HTML page with a form that accepts new expenses
- Node.js backend that talks to the Google Sheets API
- Google Sheet to store data in
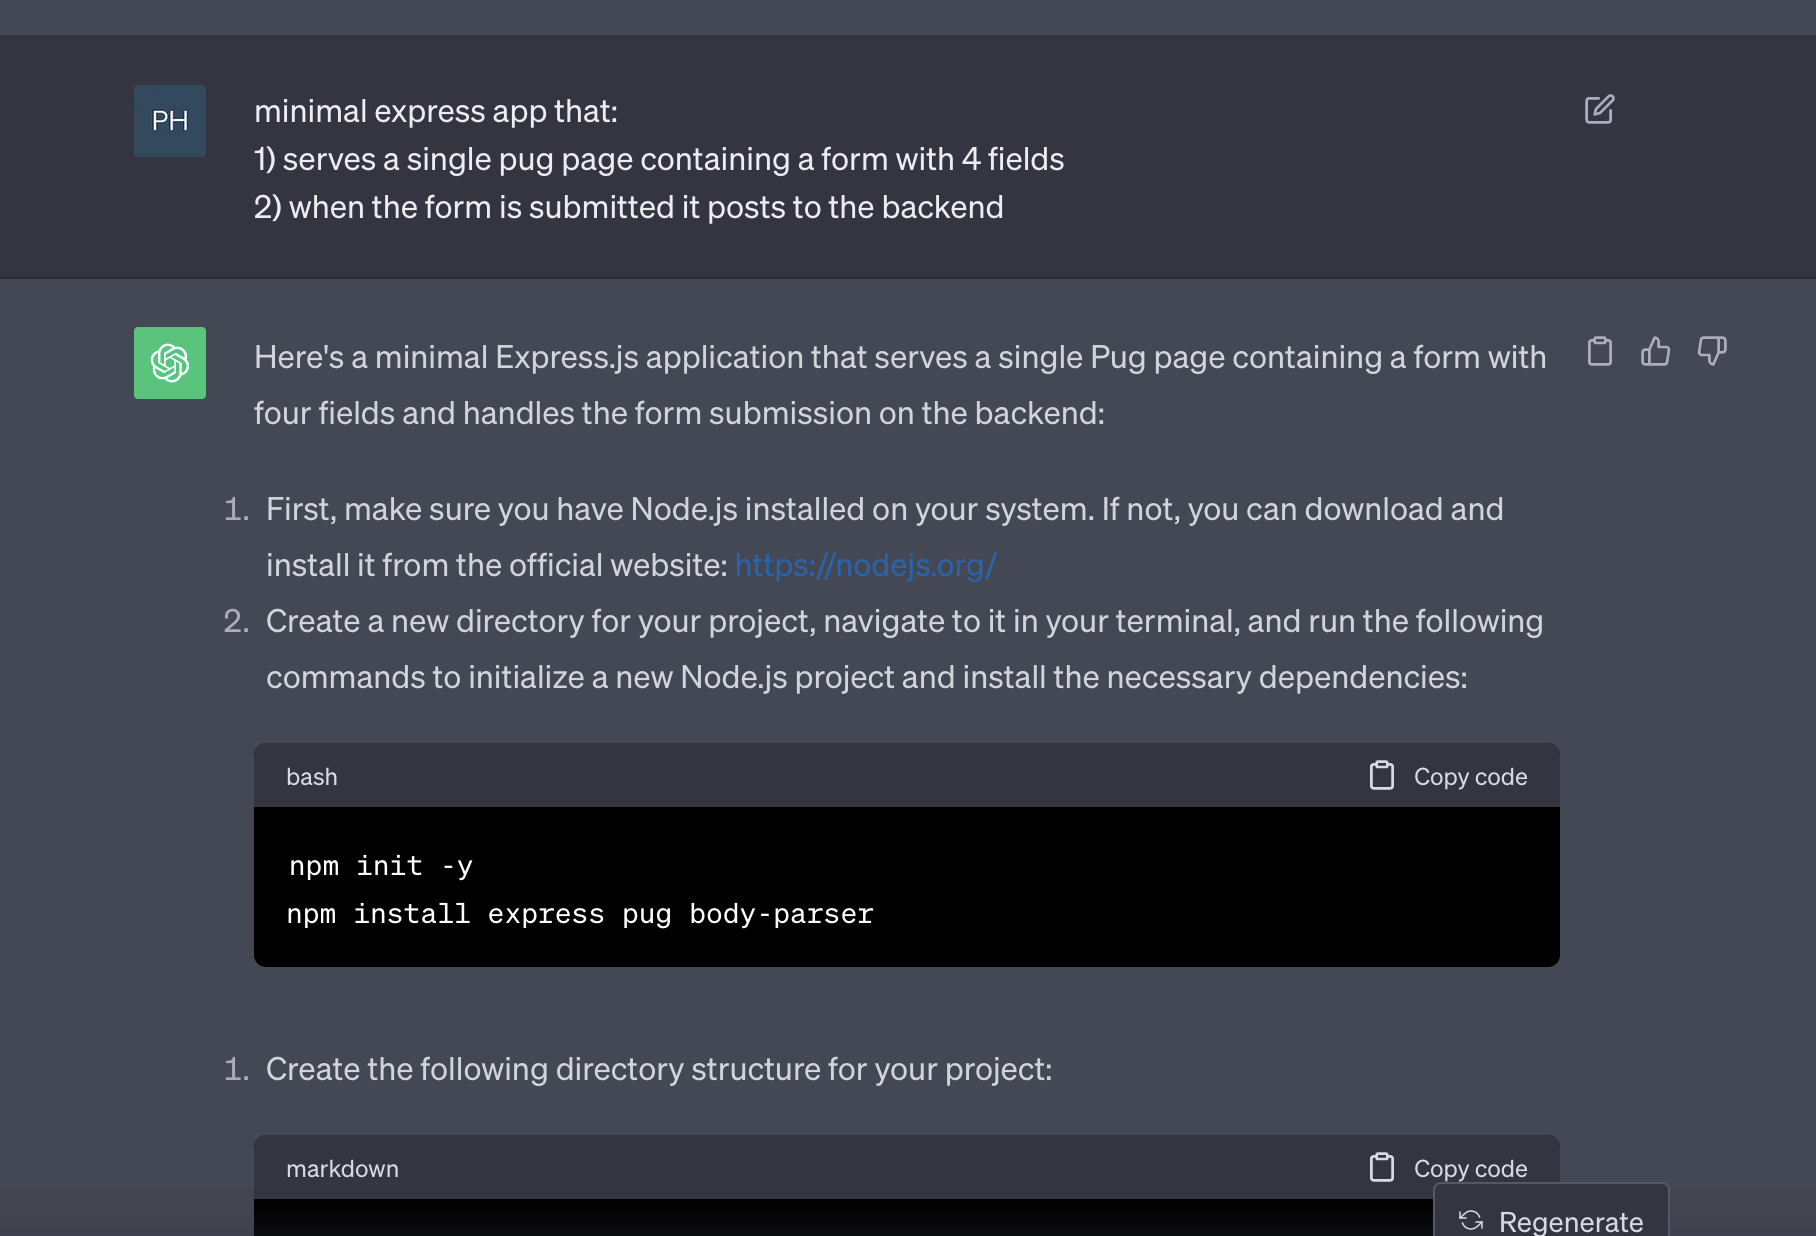
Node.js (Express.js) Backend
I started by creating a simple Express.js backend that serves the HTML page consisting of a form for collecting new expense data. This was an easy task for ChatGPT, which gave me everything I needed. In retrospect, I probably should have been more detailed in prompt (e.g. rather than just saying 4 fields, I could have specified what these fields should be).
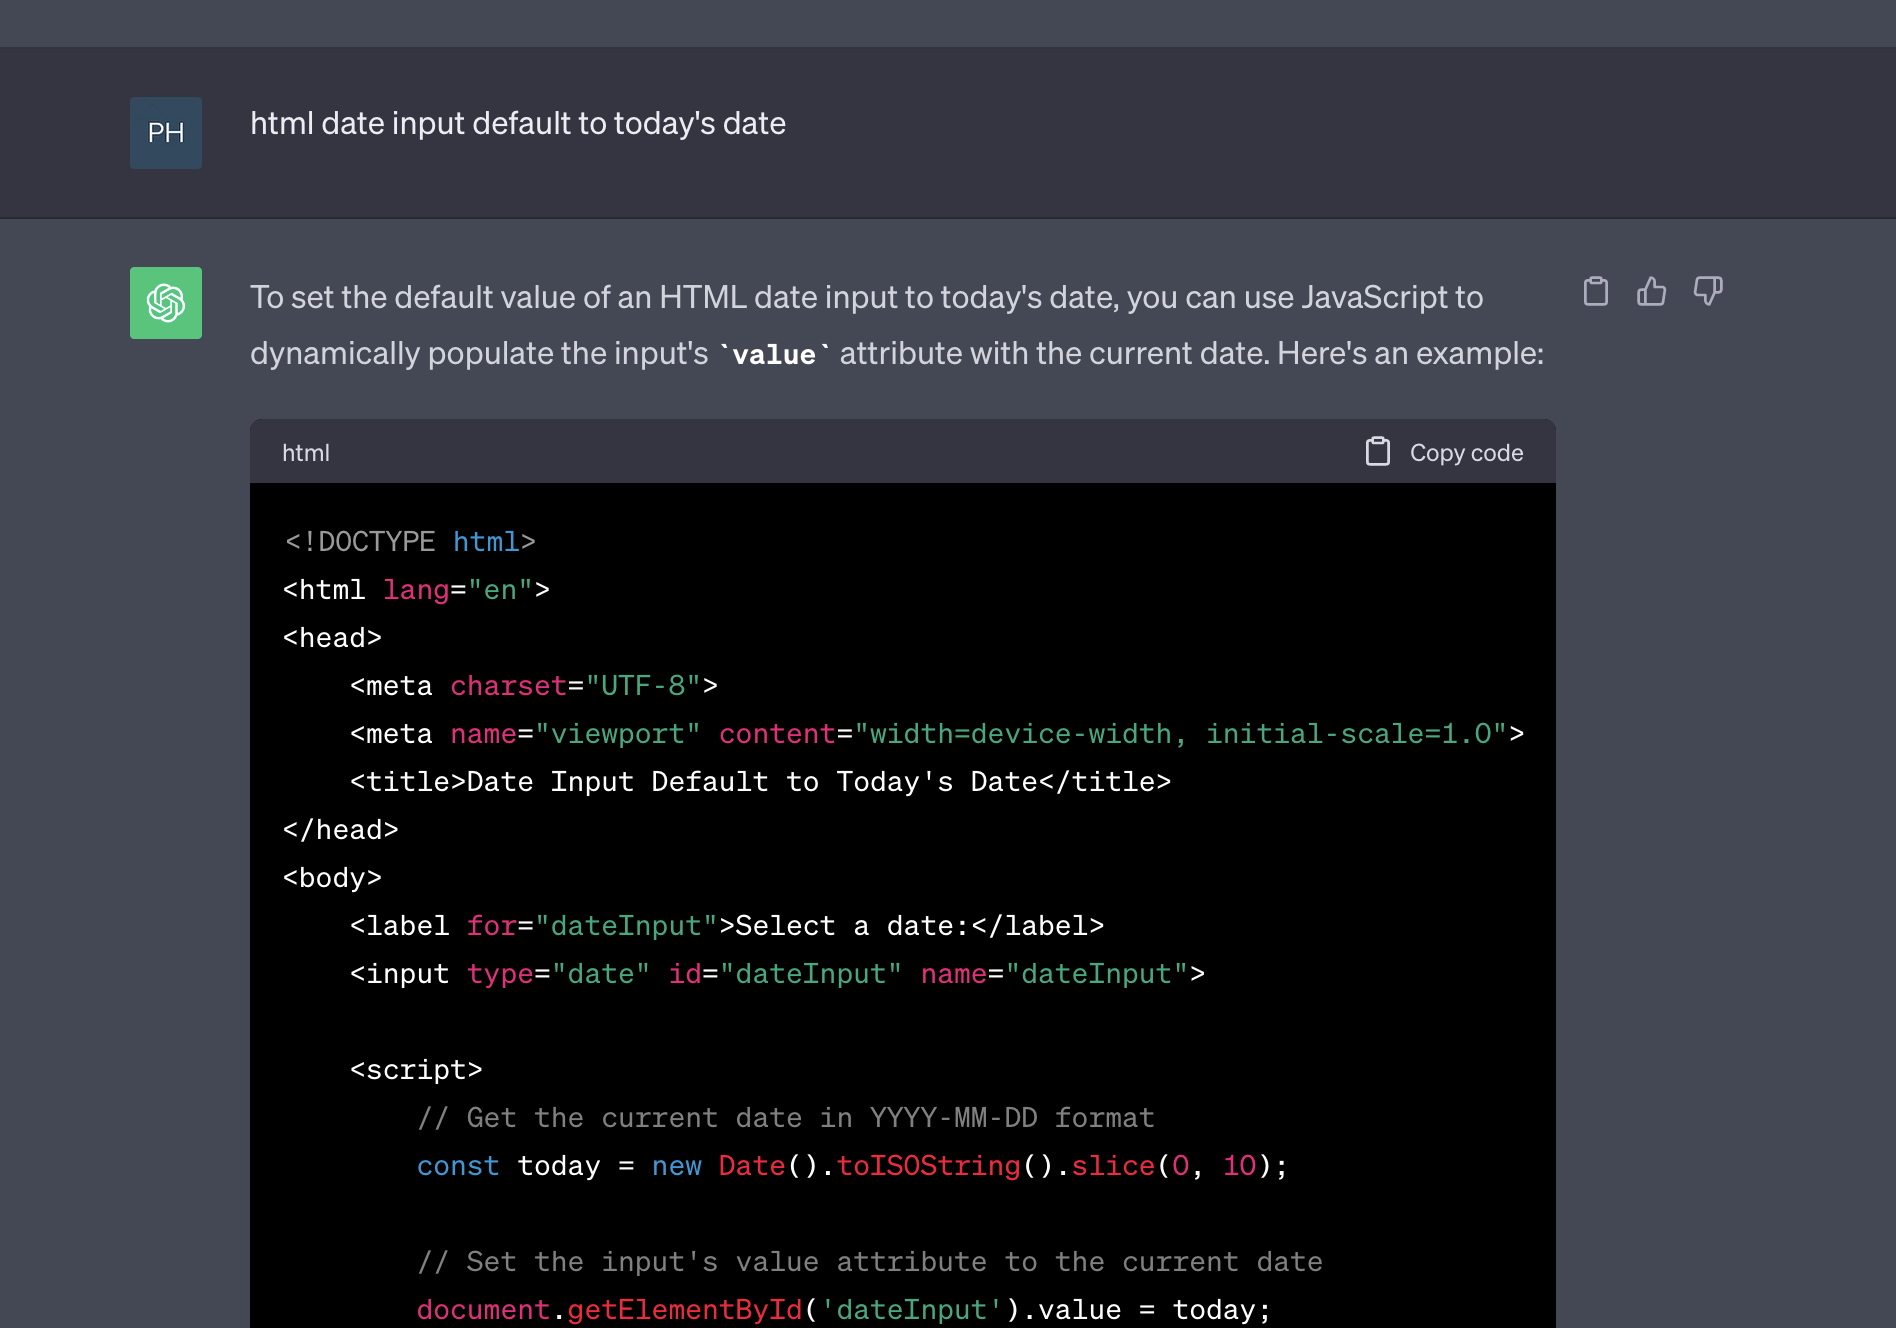
Another thing I asked ChatGPT for was to help me generate some Javascript code to make sure the date field defaults to today’s date (since there is no built-in way to do this with just HTML).
Google Sheets API
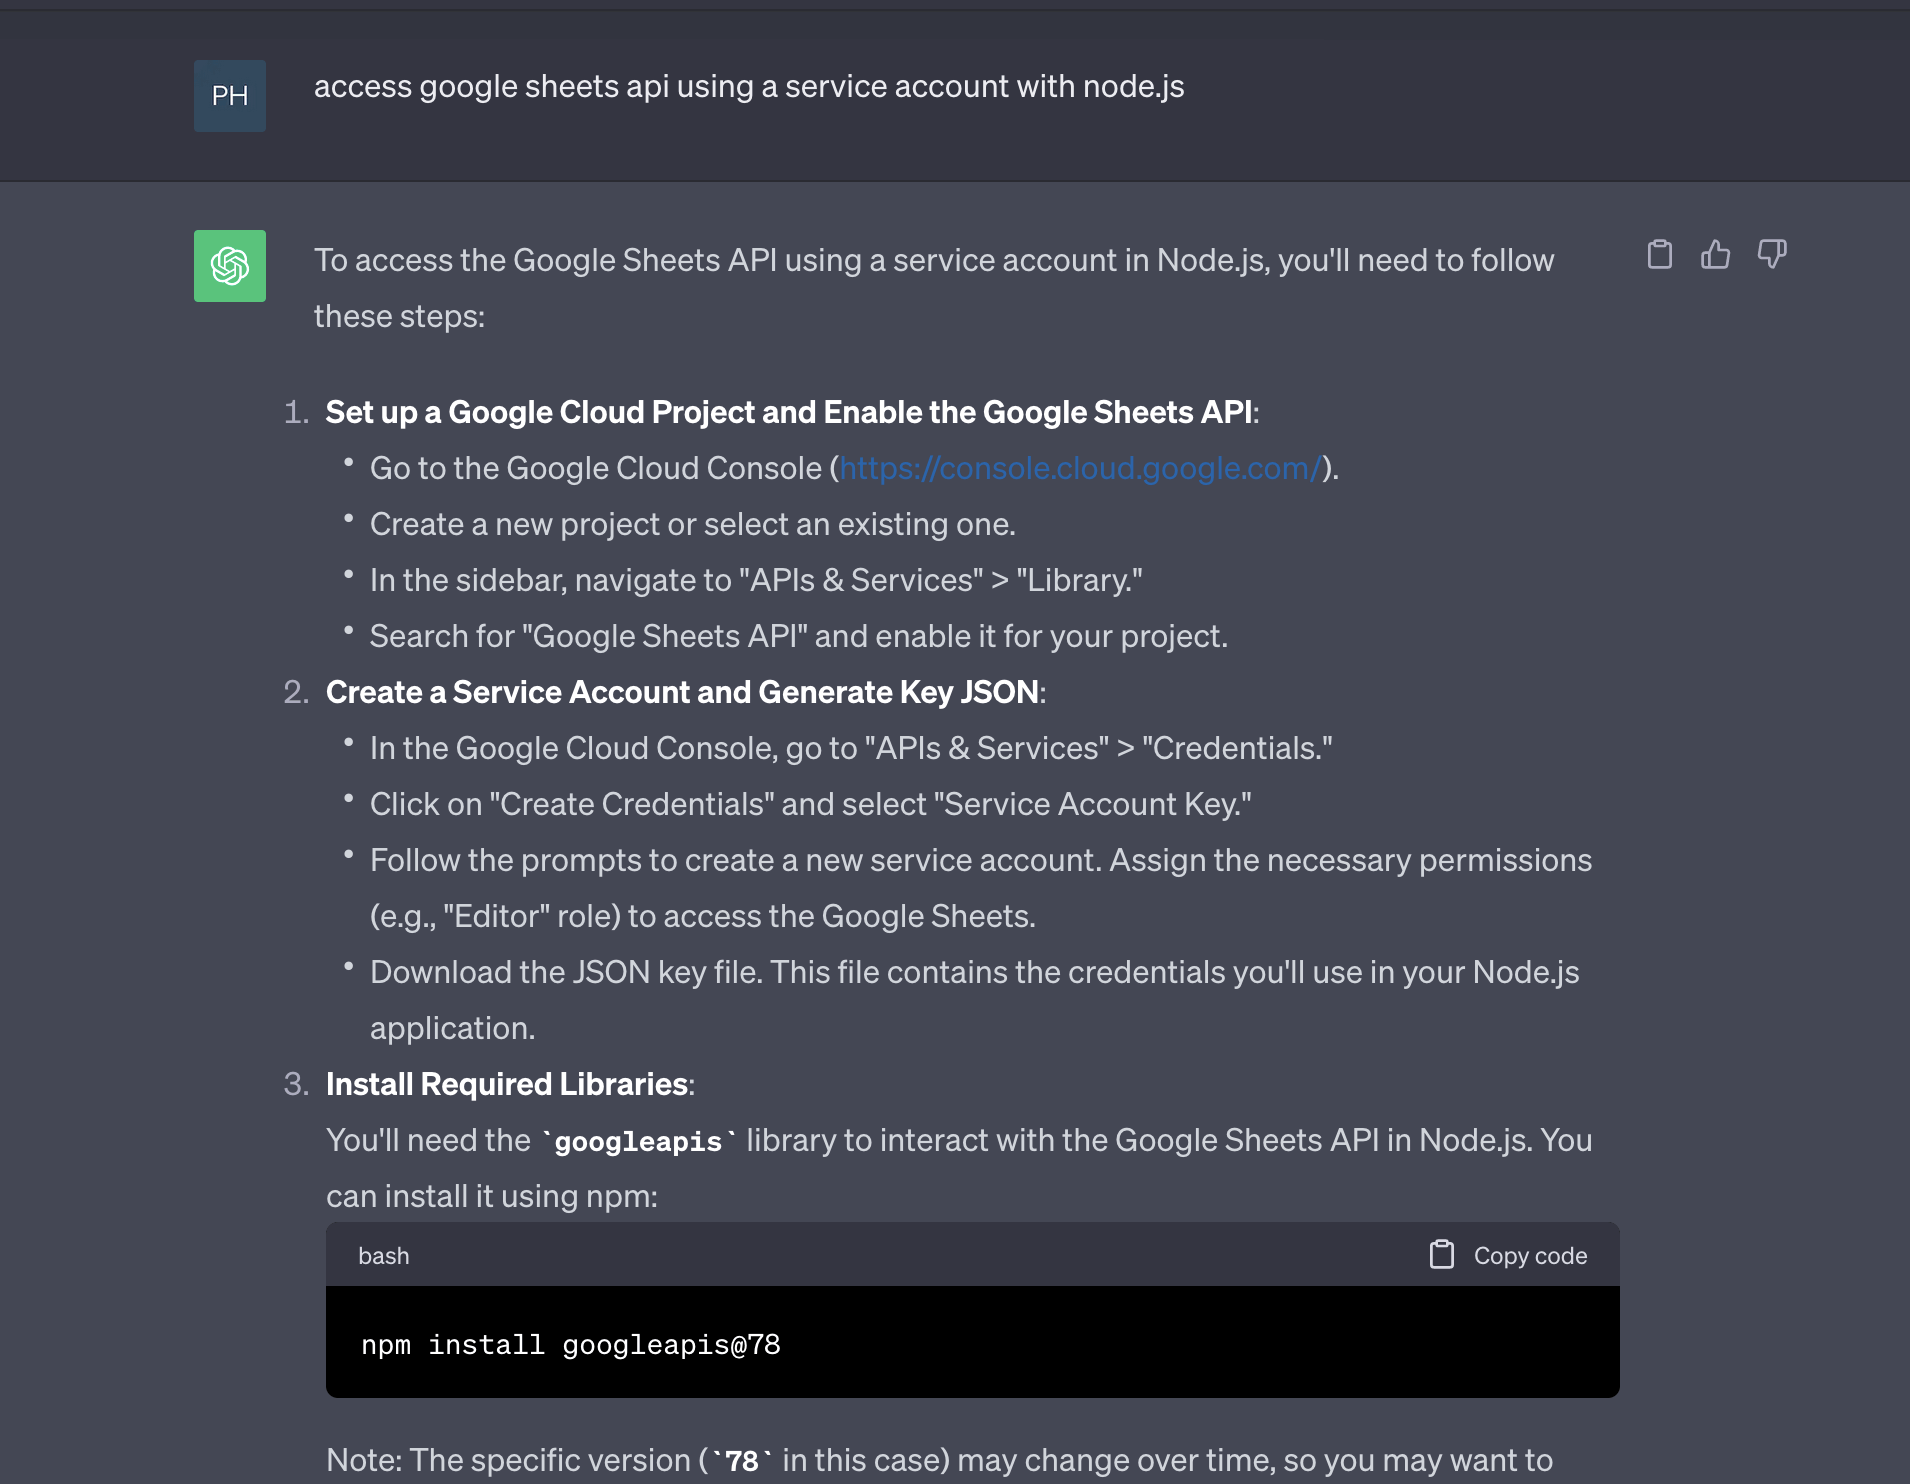
With that complete, the next step was to hook up the Google Sheets API. I knew I’d be using a Service Account for this, so I asked ChatGPT for the instructions and code needed to do this. For the most part it got all of this right as well, which I was thankful for, because the Google docs are awful.
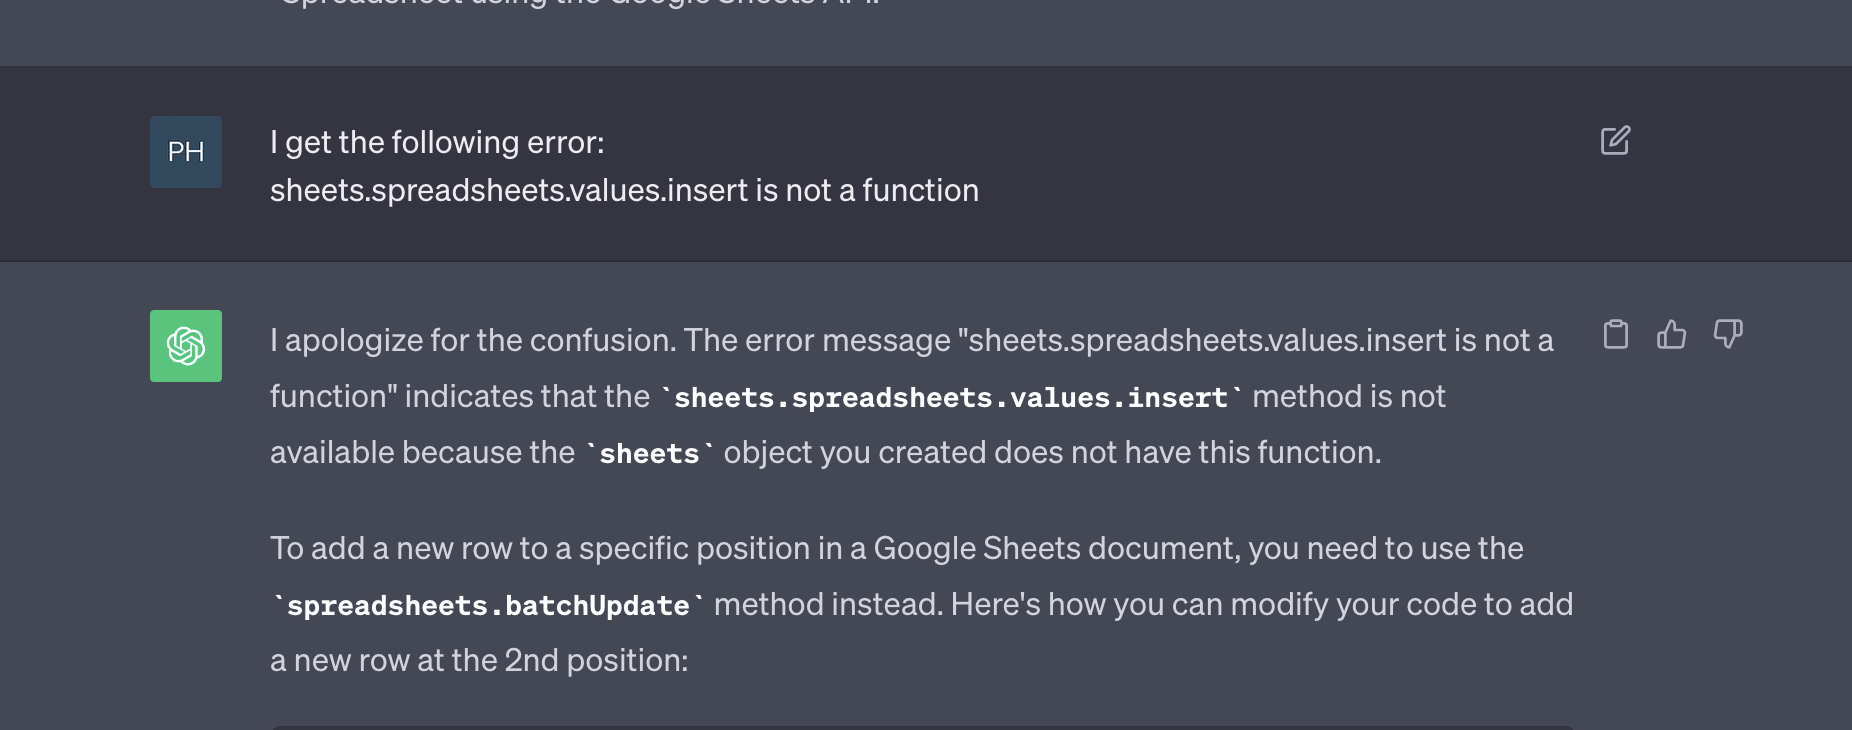
Next I needed some code to add new data to the spreadsheet. I specifically wanted to insert new data on the 2nd row of the spreadsheet (under the header row). At first ChatGPT struggled a bit with this, giving me code examples with functions that didn’t even exist.
Eventually I was able to get what I needed, although I struggled generating the proper code to insert values with default formatting for dates and numbers. I don’t blame ChatGPT for this, since it’s just as difficult trying to figure out how to do this by reading Google’s own documentation.
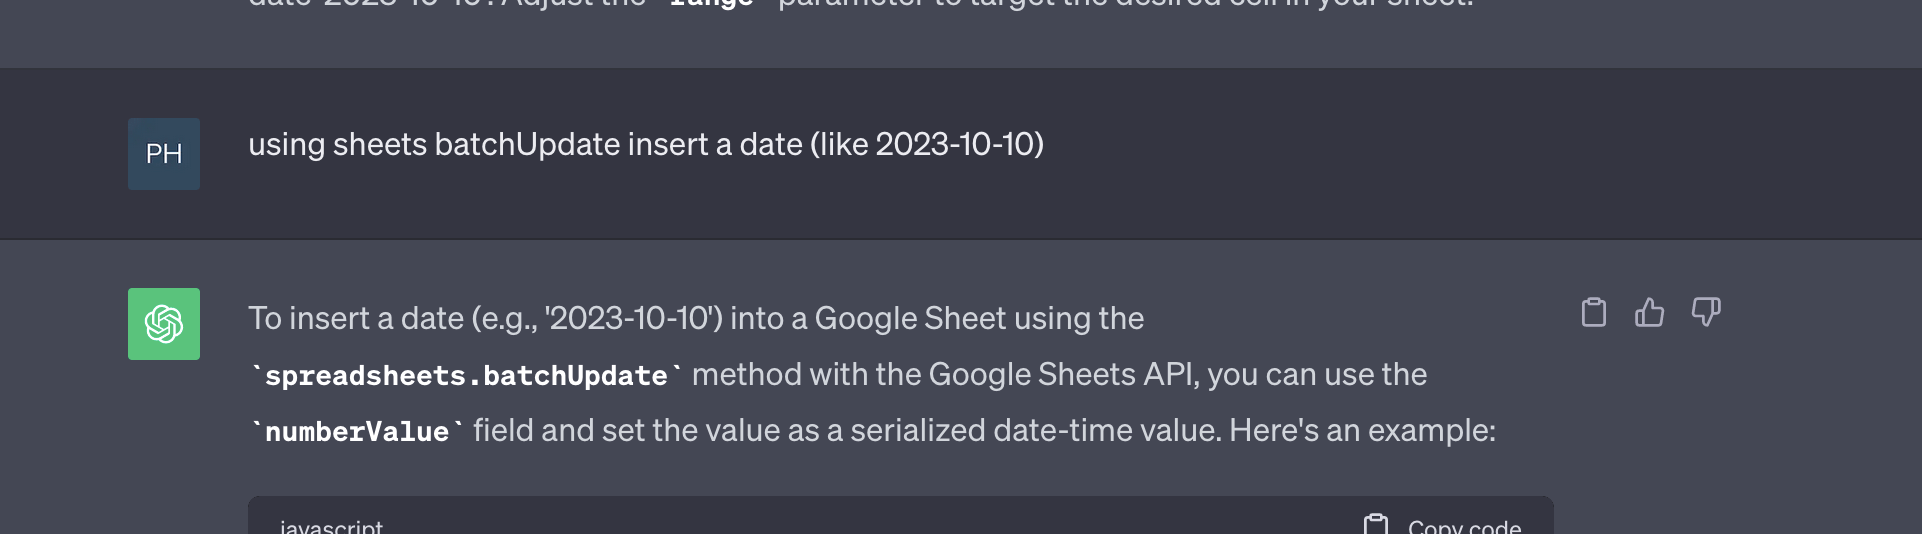
After several attempts ChatGPT eventually generated an example using the batchUpdate function with a PASTE_NORMAL update type, which I used with tab delimited data in order to have Google Sheets interpret the text automatically. This worked well, and here’s what the final function looks like:
export async function insert(date, cost, category, description) {

  // Define the values you want to add as a new row
  const newRowValues = [date, cost, category, description];

  // Prepare the request to insert the new row at the 2nd position
  const request = {
    spreadsheetId,
    resource: {
      requests: [
        {
          insertDimension: {
            range: {
              sheetId: 0, // Assuming the first sheet
              dimension: 'ROWS',
              startIndex: 1, // Insert at the 2nd position
              endIndex: 2, // Insert one row
            },
            inheritFromBefore: false,
          },
        },
        {
          pasteData: {
            coordinate: {
              sheetId: 0, // Assuming the first sheet
              rowIndex: 1, // The 2nd row
              columnIndex: 0, // Start from the first column
            },
            data: newRowValues.join('\t'),
            type: 'PASTE_NORMAL',
            delimiter: '\t', // Use tab as a delimiter
          },
        },
      ],
    },
  };

  // Execute the batch update request
  try {
    const response = await sheets.spreadsheets.batchUpdate(request);
    // console.log('New row added successfully.');
  } catch (error) {
    console.error('Error adding new row:', error);
  }
}
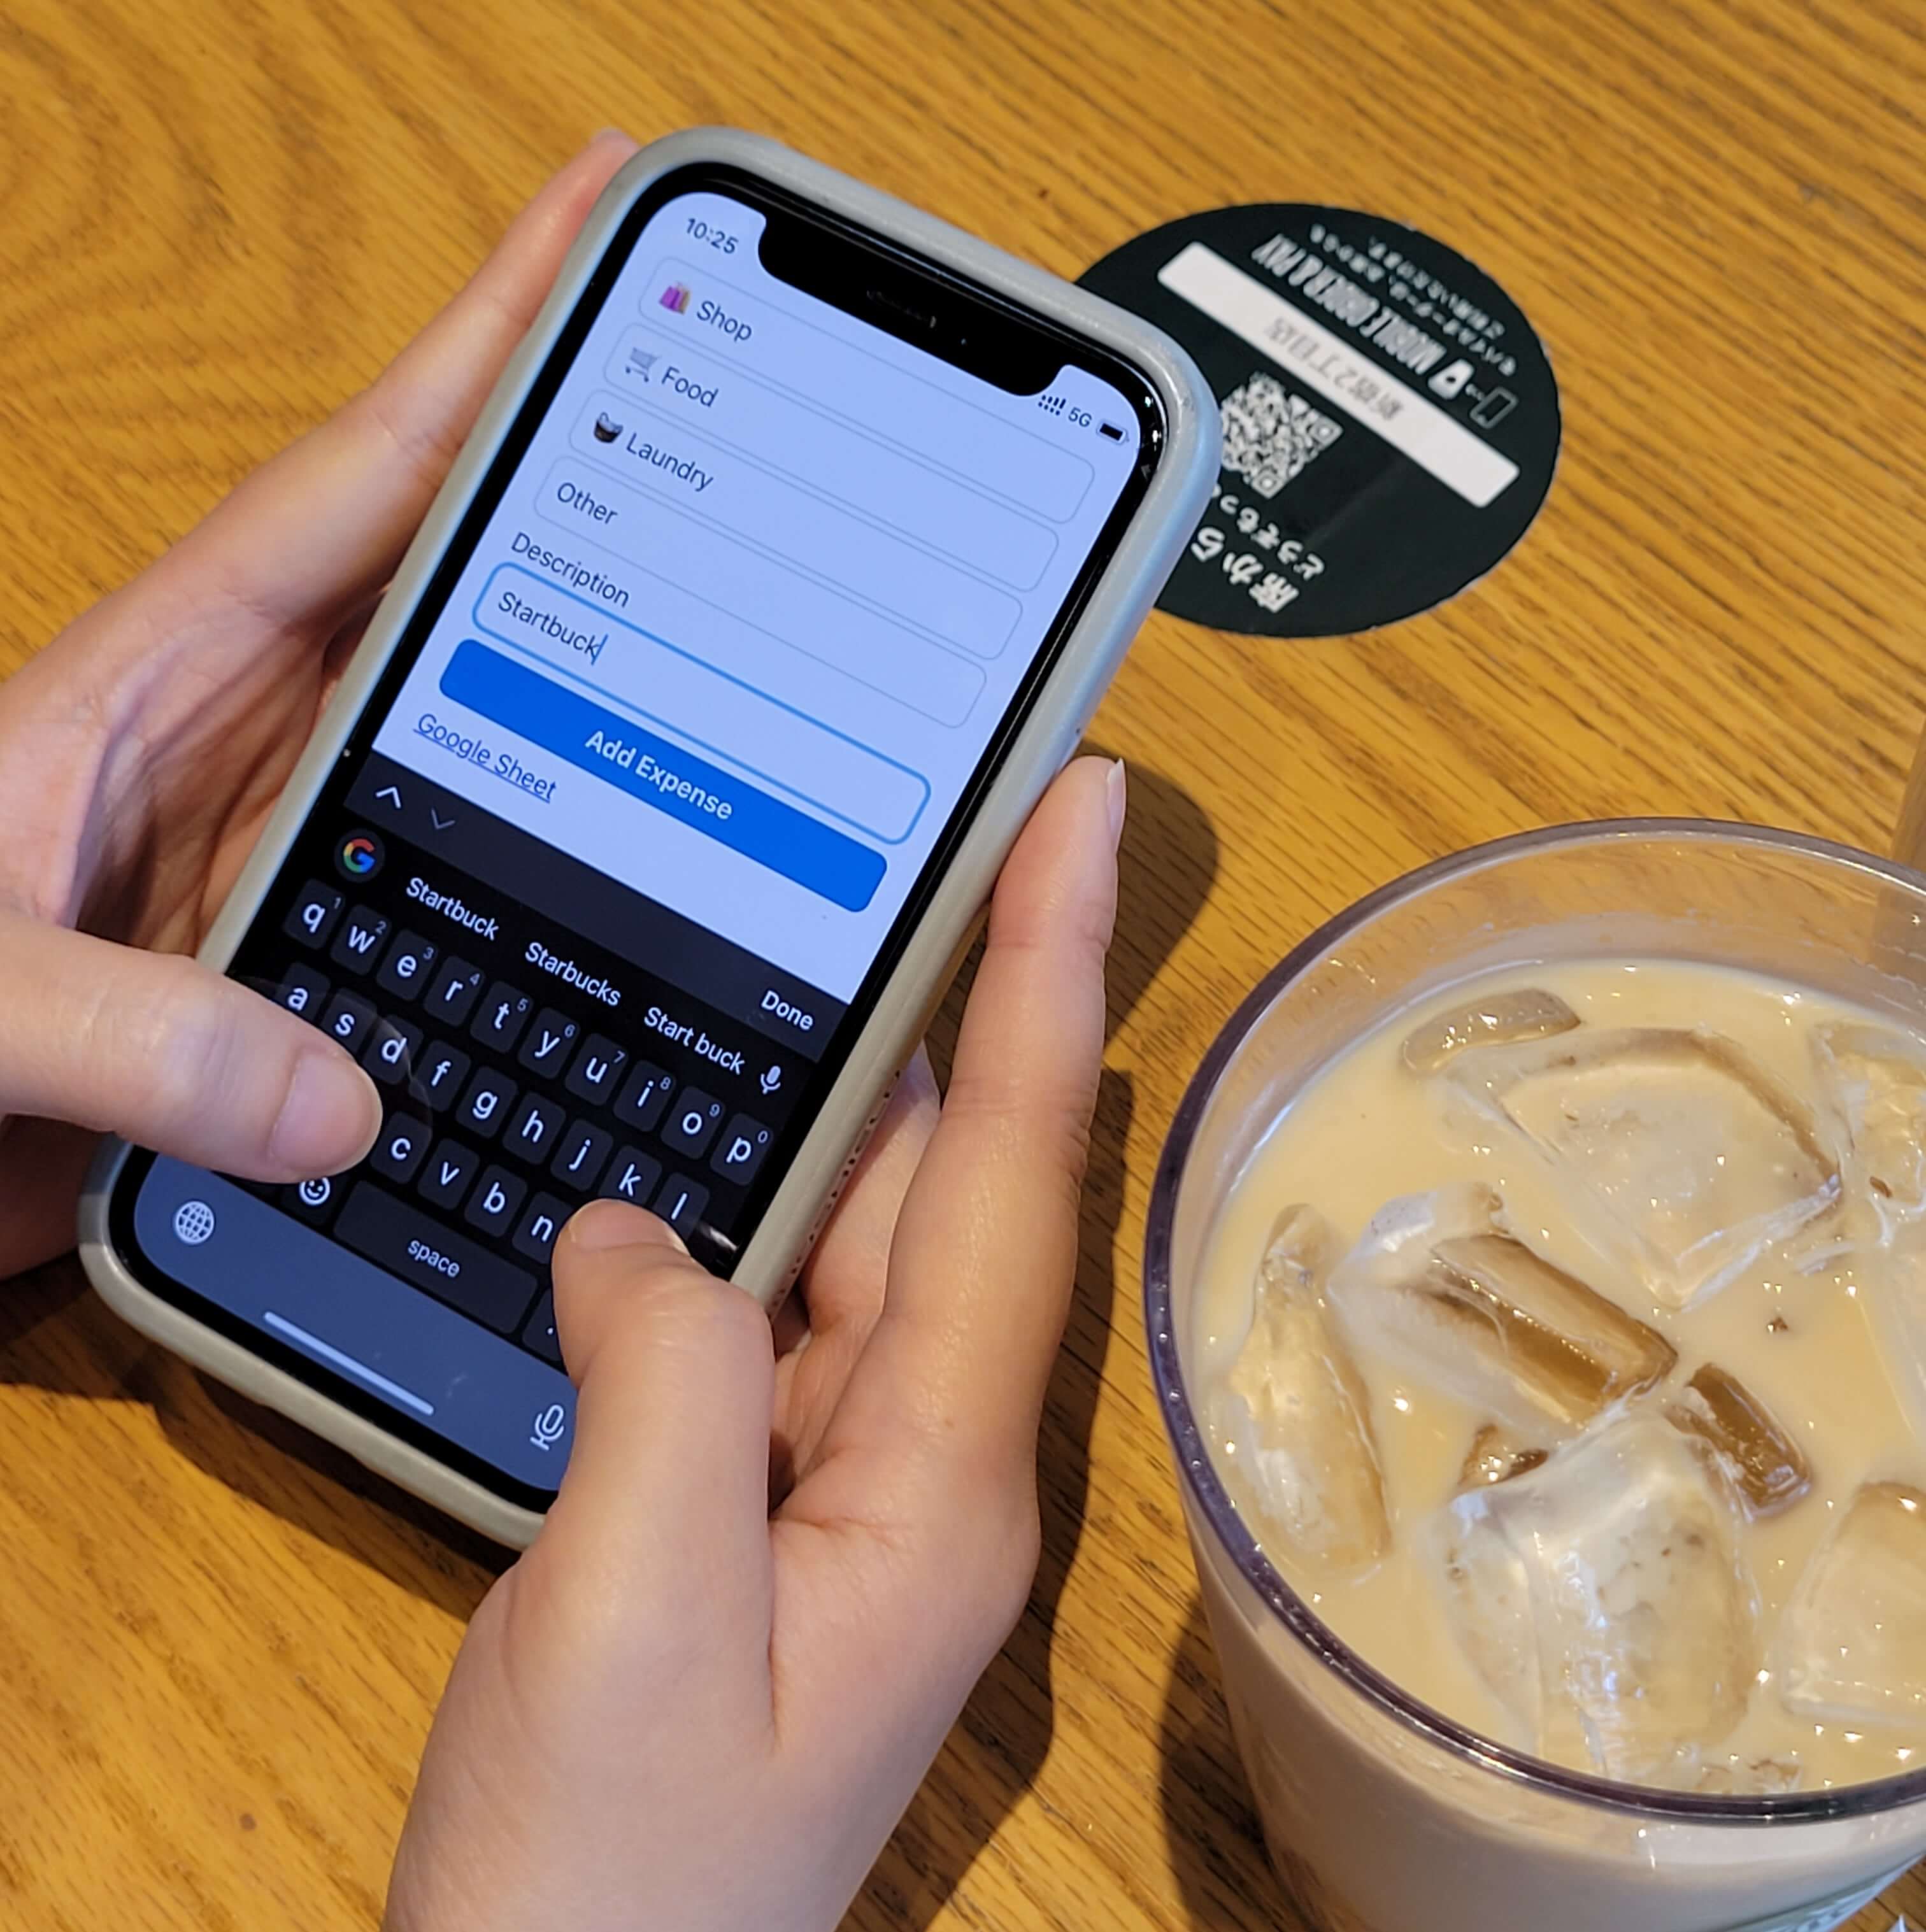
With this, the basic expense tracker was basically complete. A simple form that POSTs data to the backend, which in turn pushes the new data to my Google Sheet. After a bit of polish and CSS, the app was pretty much ready to use!
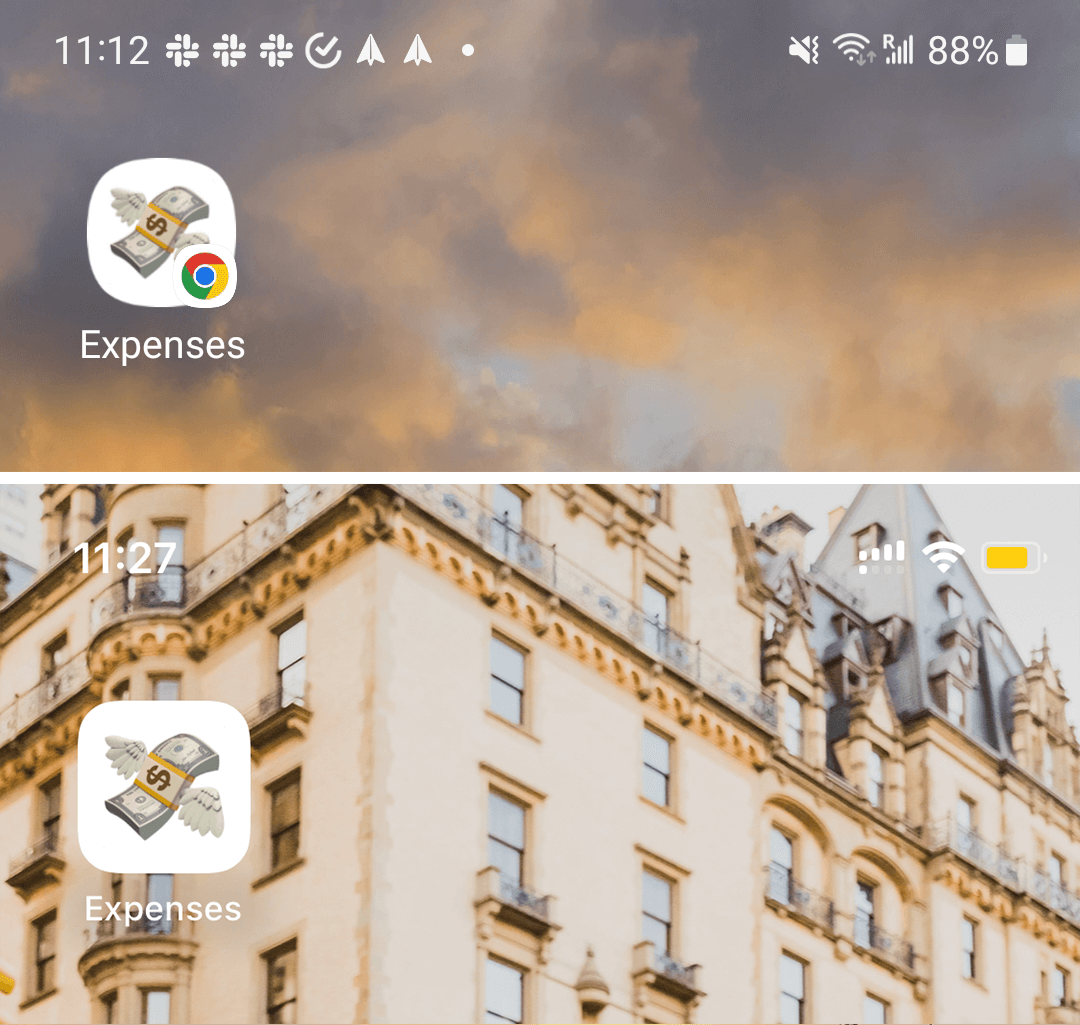
Once I deployed it on my “side-project VPS” I could open the web app on both Android and iOS and then save the app to the home screen. I only wish Android wouldn’t overlay the Chrome icon :/
Enhancements
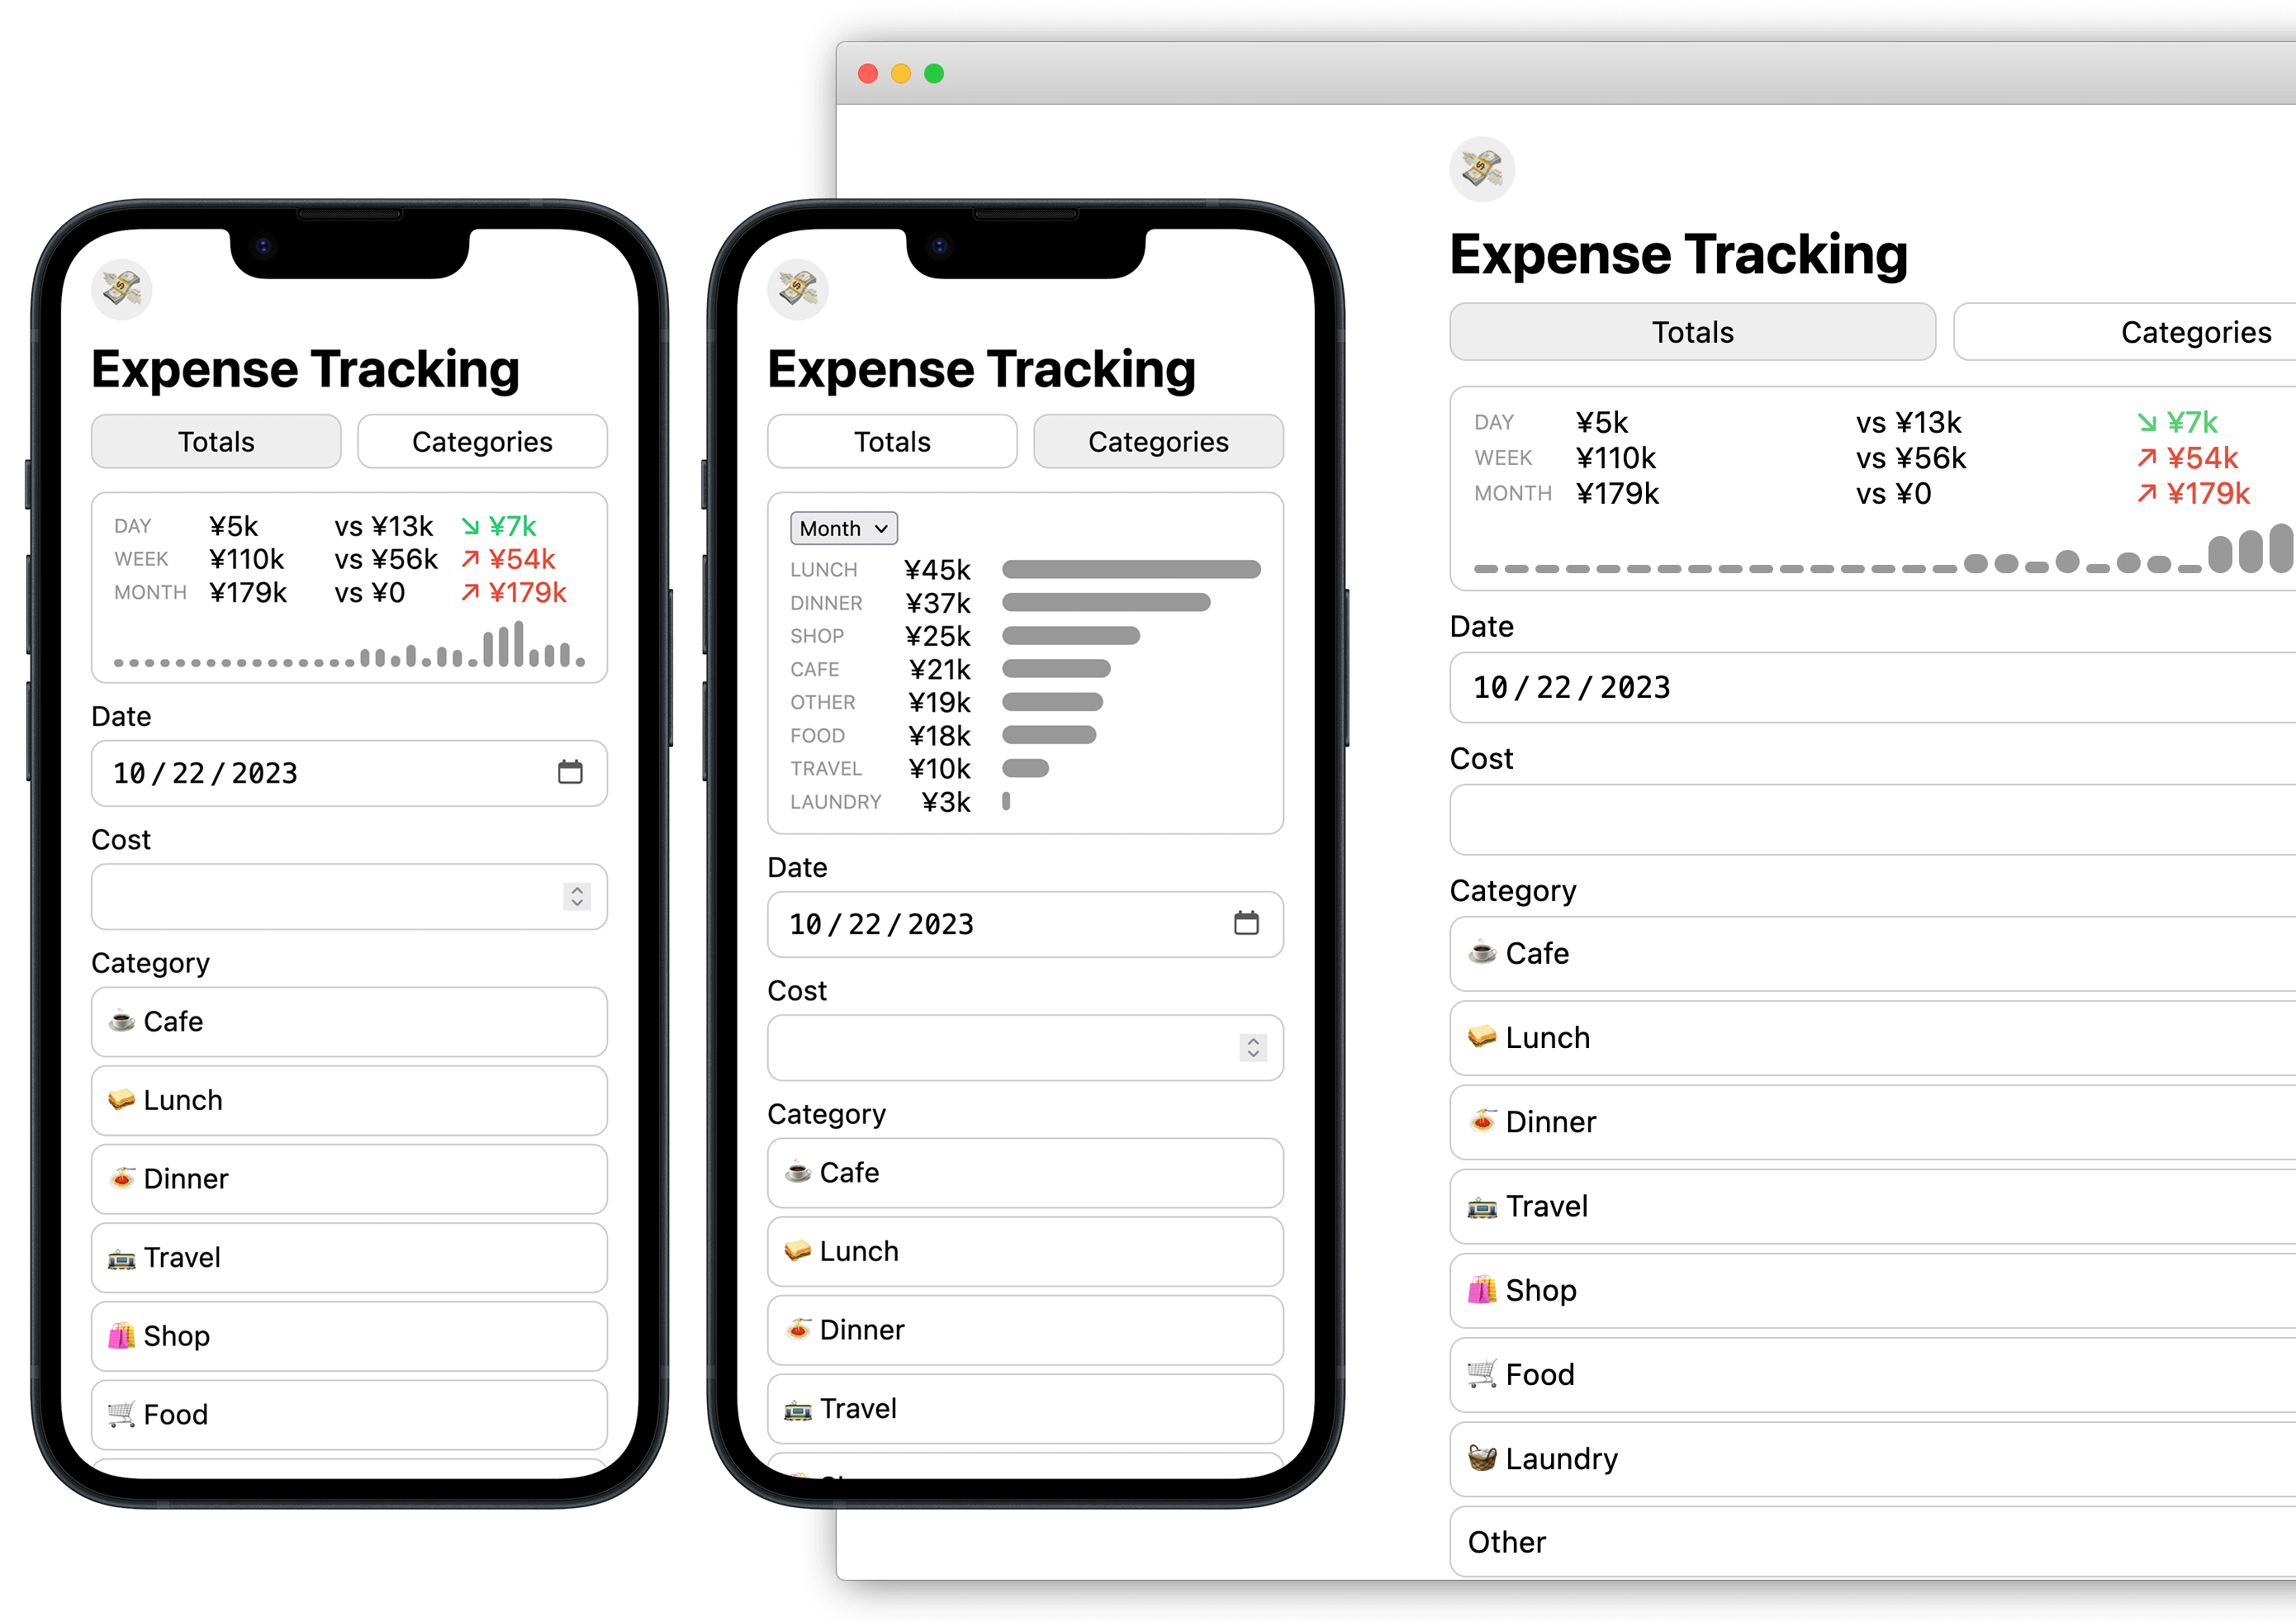
For adding new expenses this worked great. However, I quickly felt that one thing was missing from the app though. Rather than just pushing expense data, it would be nice if the app also displayed some data to show how much I’m spending. Of course, I can do this by opening the spreadsheet, but it would be nice to display some basic information in the app as well.
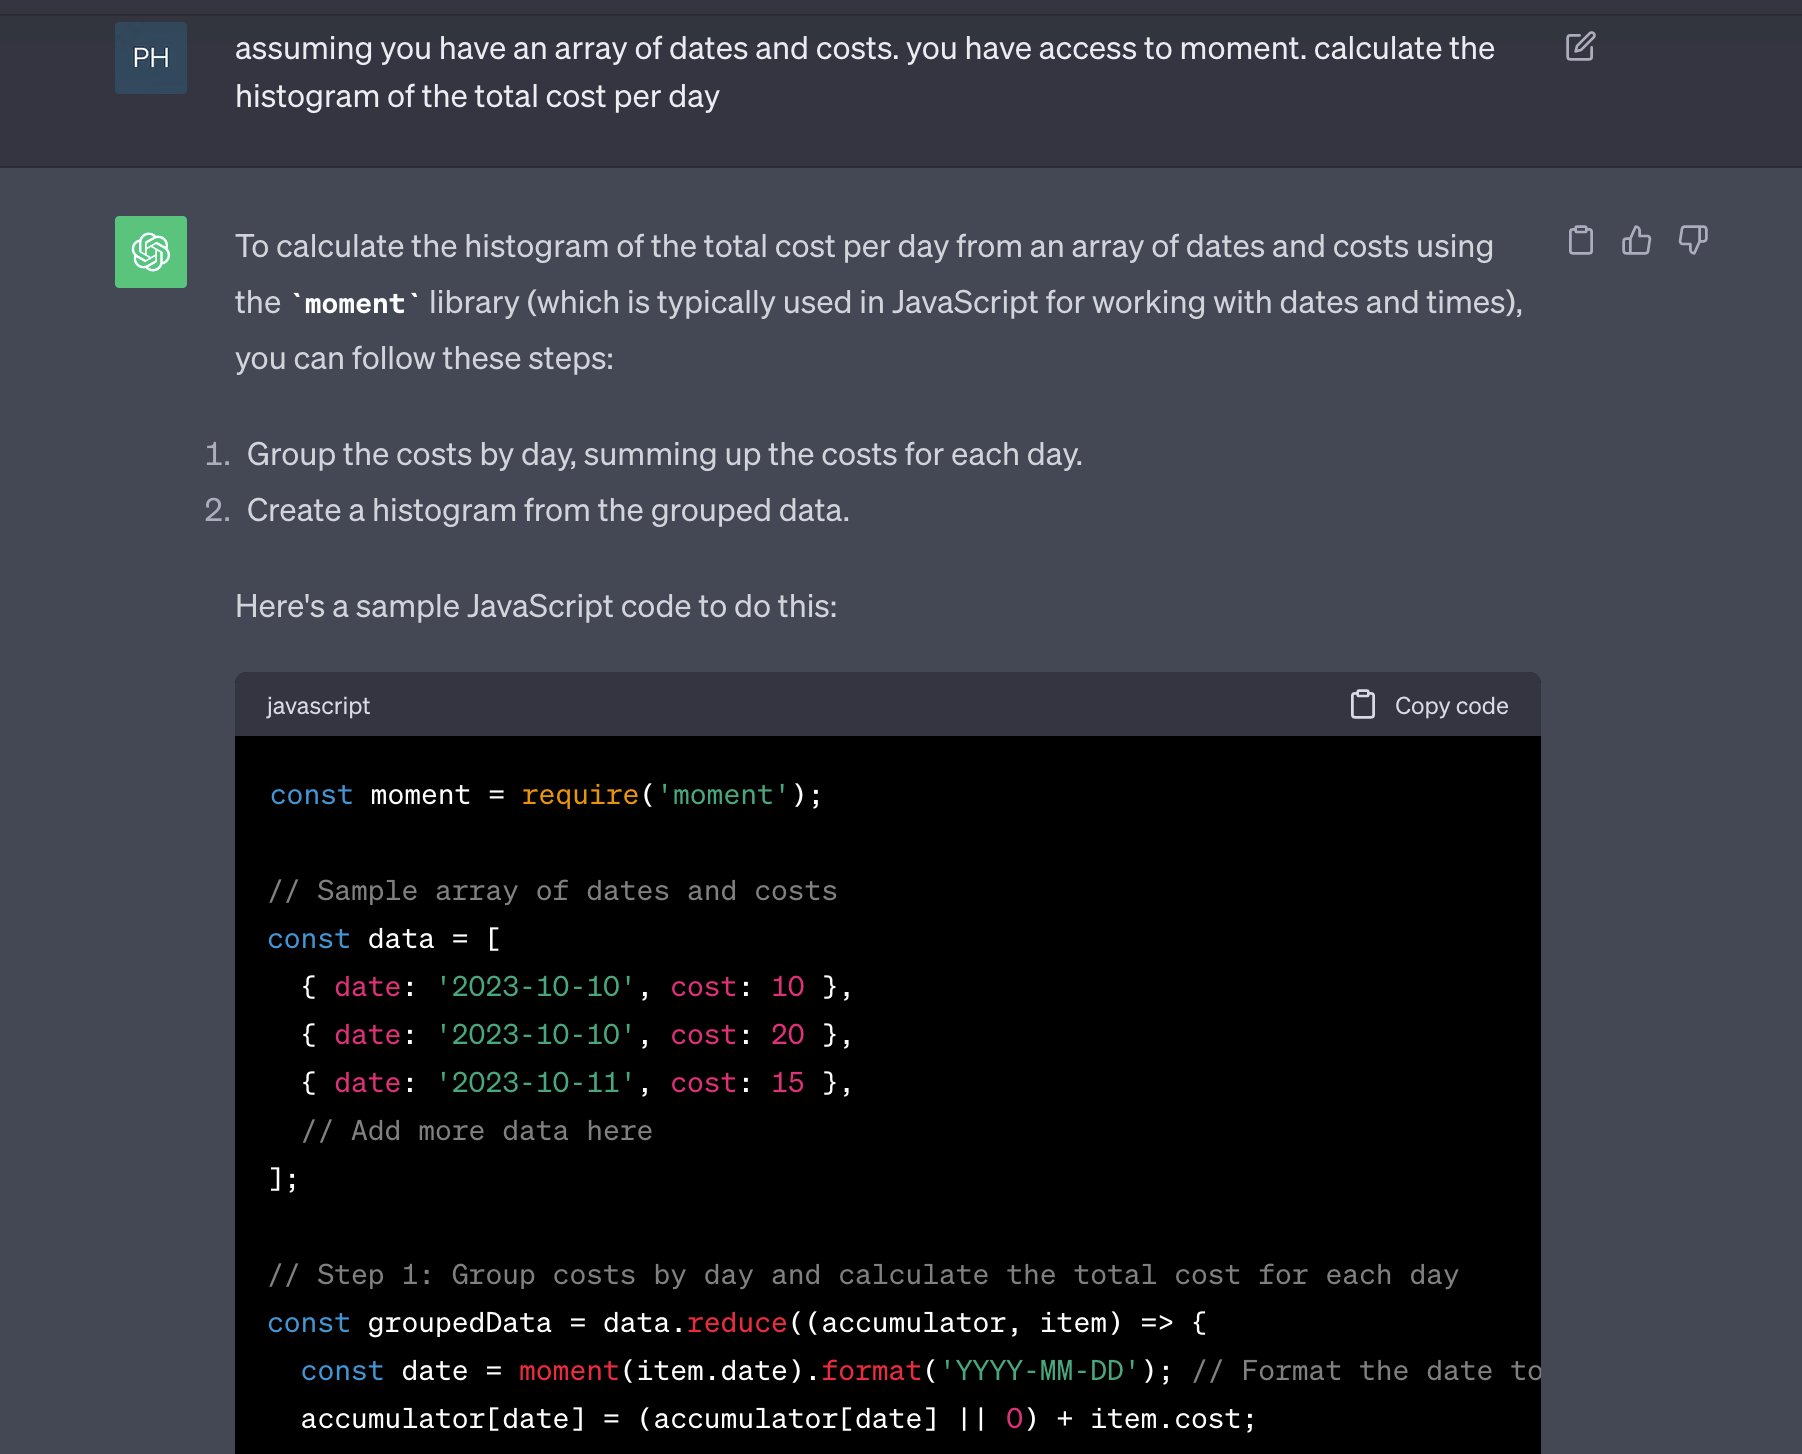
Totals and Histogram
Again, I used ChatGPT to help me generate some code to calculate a histogram of my recent spend. Having ChatGPT help generate this type of code is such a huge time saver. It’s not difficult to do, it just takes time!
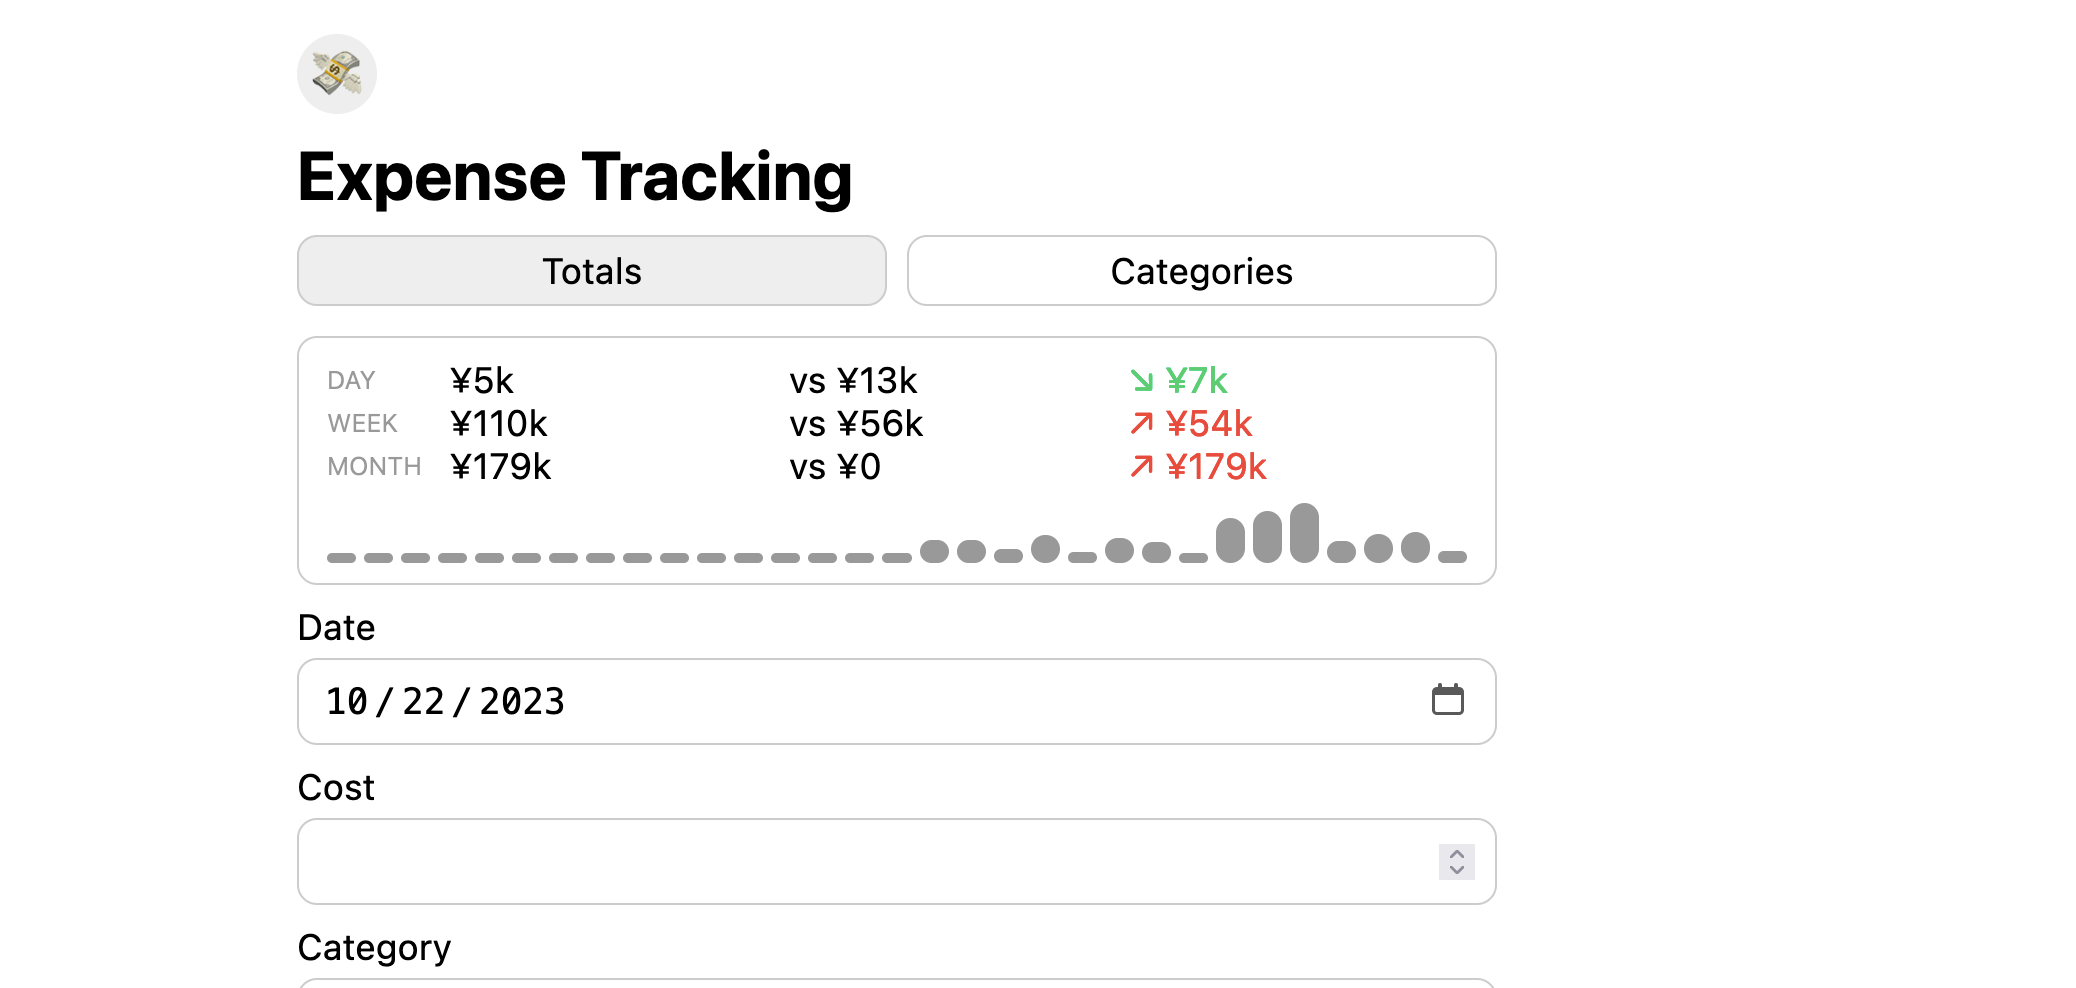
After a couple of prompt-adjustments, I was able to render a 30-day histogram, along side displaying my daily, weekly and monthly totals, as well comparing to previous periods, giving me a nice overview of my spending habits.
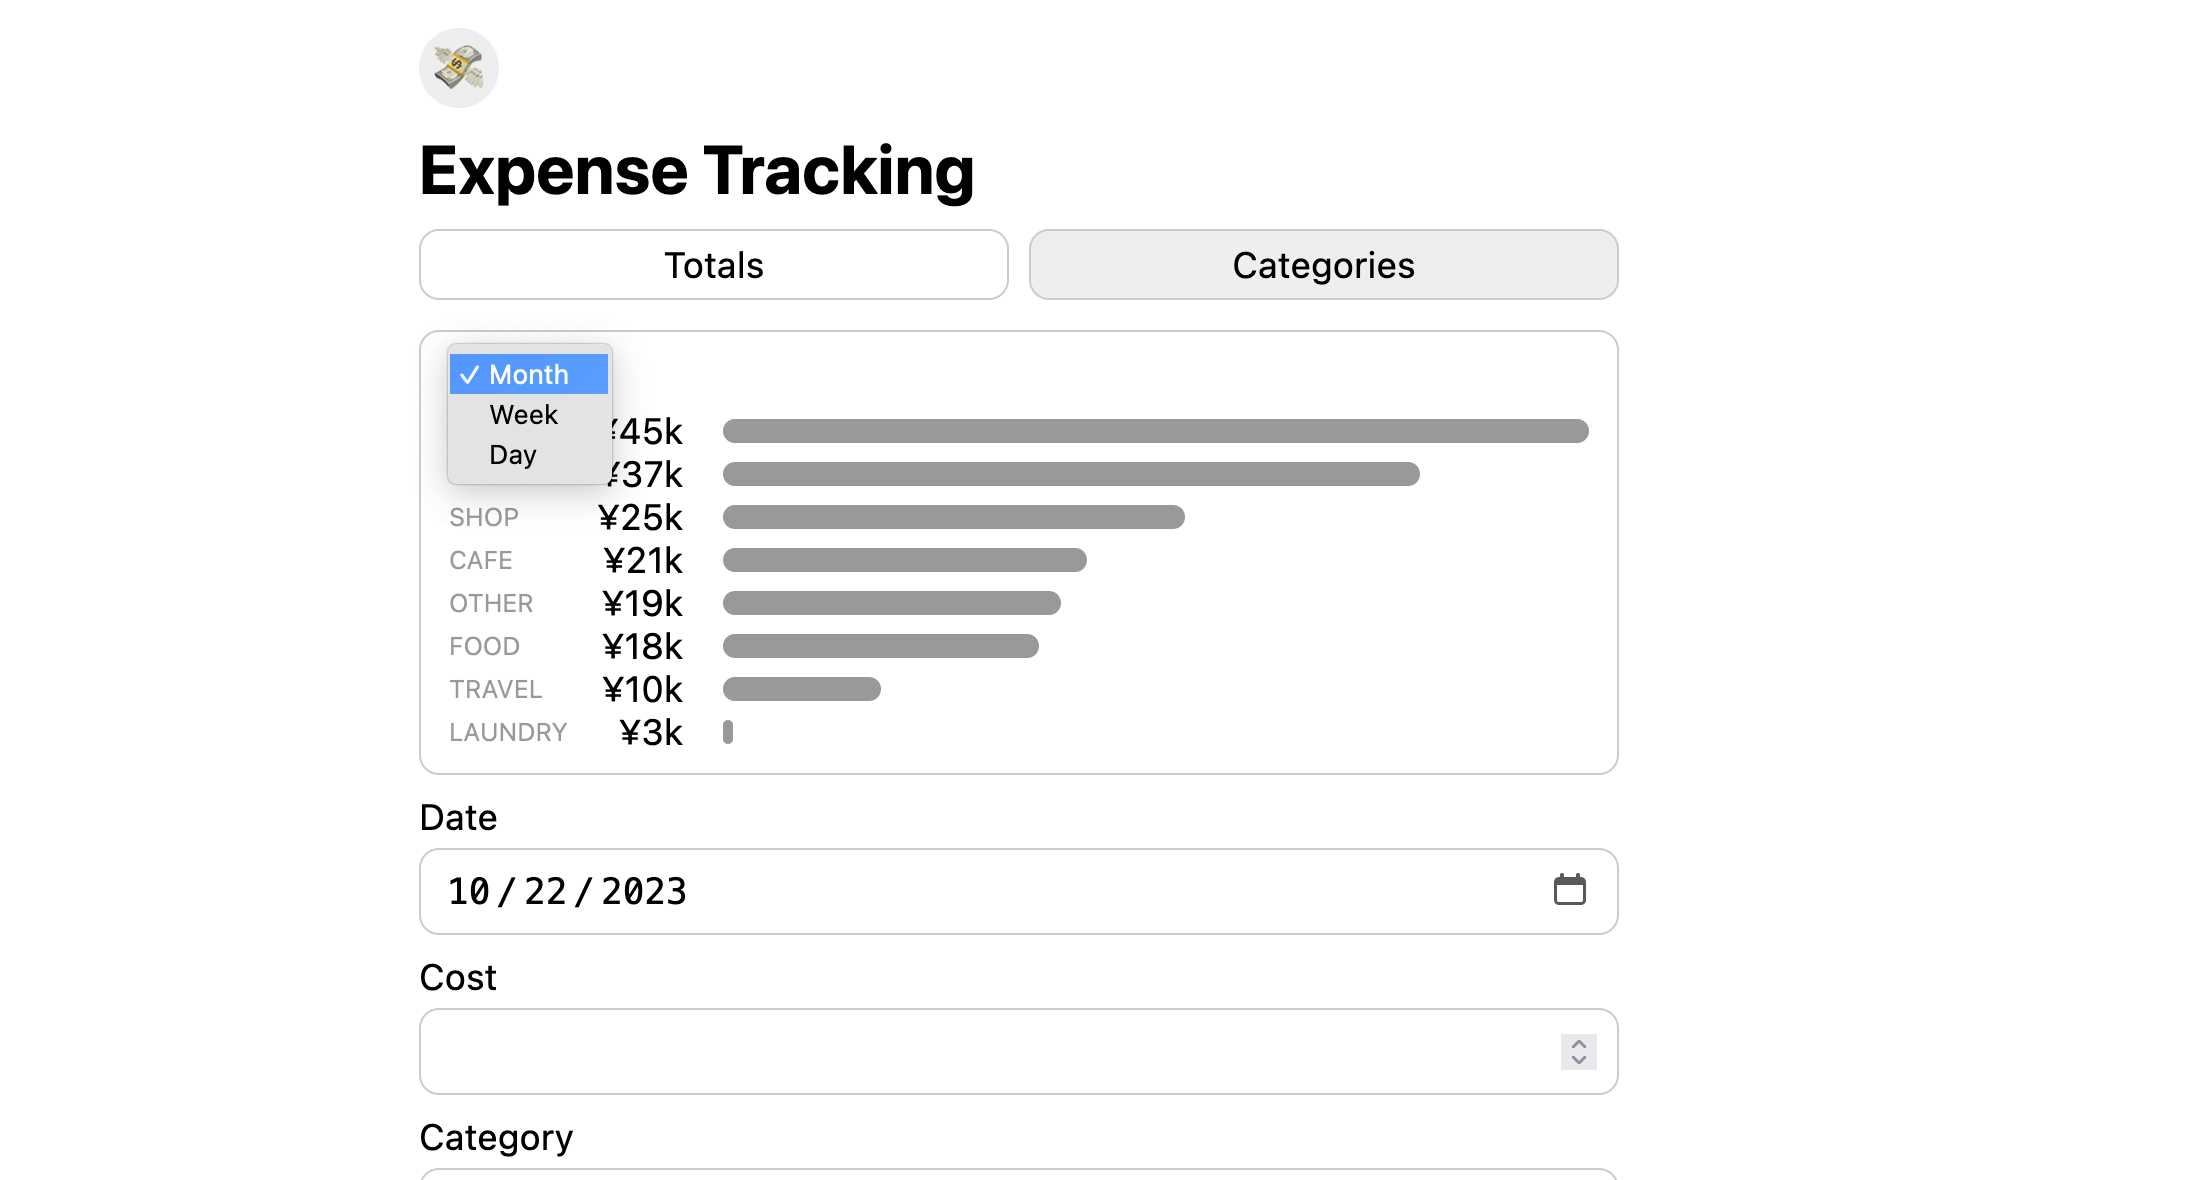
Categories
Another thing I wanted to add was total spend by category. By tweaking the code that ChatGPT previously generated for me, I created some aggregated stats, and also included an option to display this data by different periods.
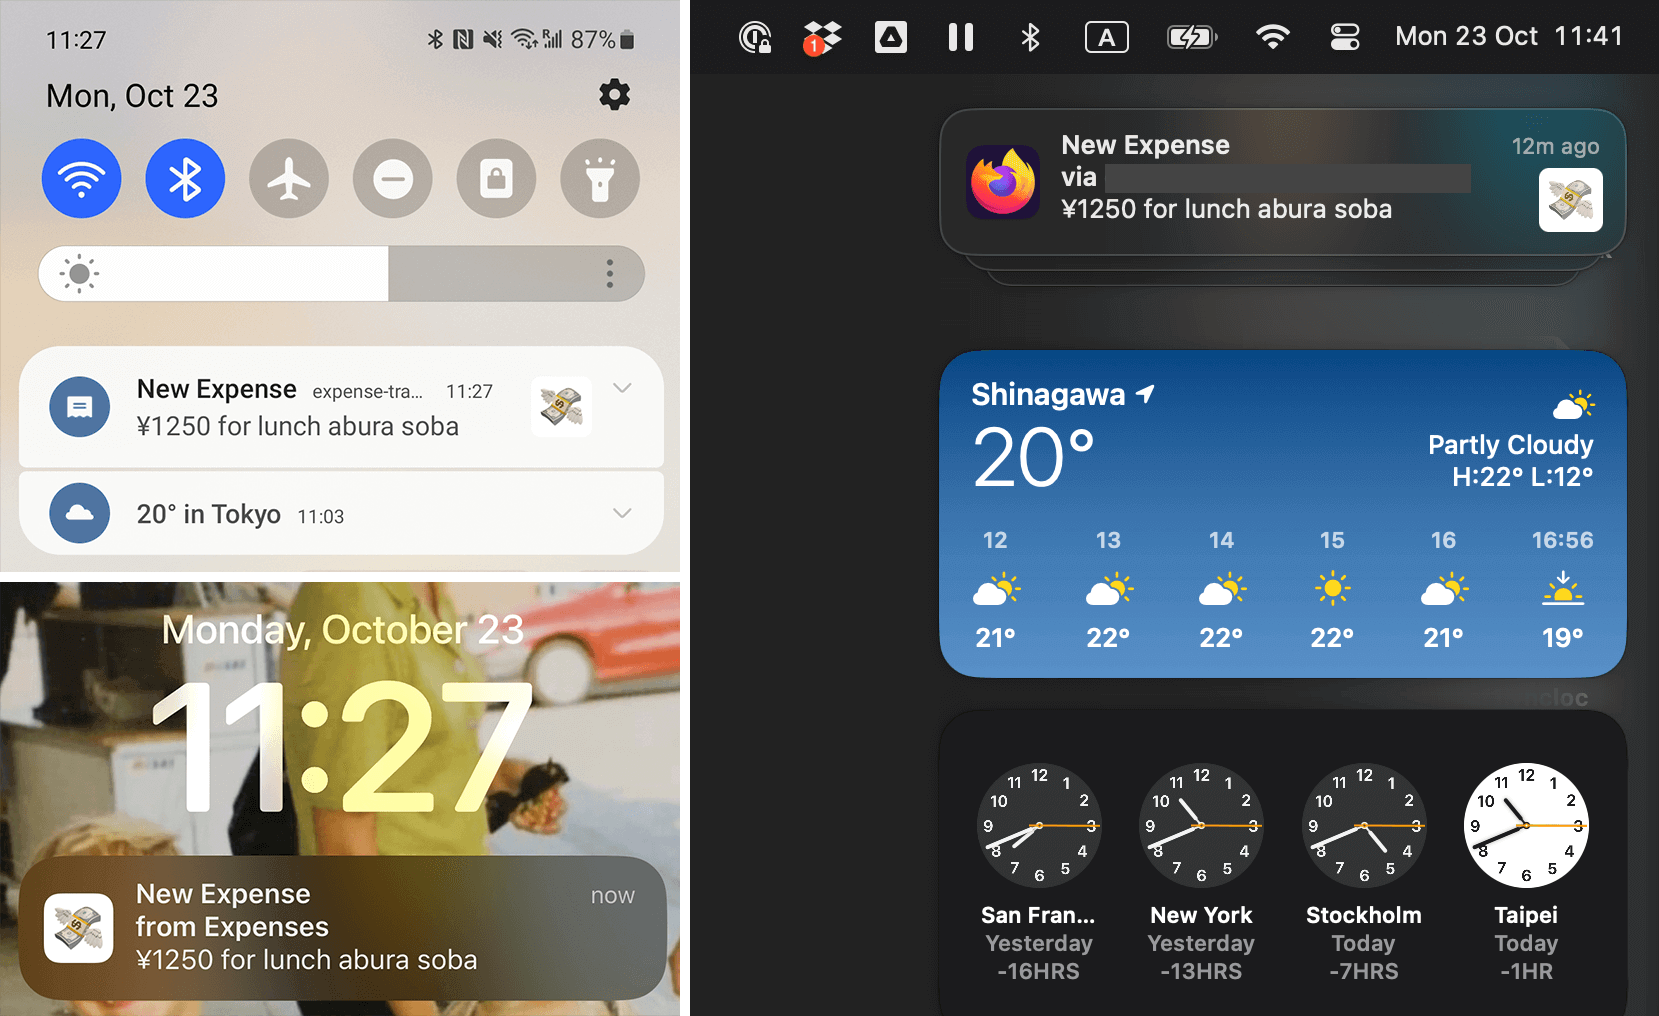
Notifications
The final feature I wanted to add was notifications. This was by far the most challenging part, and here, ChatGPT completely failed. Not only was ChatGPT unable to give me any complete examples, but I also ended up reading a lot of blog posts that seemed to just regurgitate the exact same incomplete or useless examples.
Eventually I ended up following one of Google’s code labs which did have some fairly decent examples that I was able to refer to, in order to figure out how to get it to work. In the end it wasn’t particularly difficult.
For more details on how Web Push Notifications work, I’ve written another post dedicated to just that: Demystifying Web Push Notifications
Conclusion
I’m super happy with how it turned out, and I don’t see myself ever going back to using one of the other expense tracking apps. I love having access to all of the data directly through Google Sheets, and the app works really well.
ChatGPT as a replacement for search engines
I think one of the main conclusions I have from this project is how ChatGPT is a fantastic Google replacement. All of the things I would previously Google for (like finding code examples, documentation, etc) are all much faster, easier, and pleasant to do using ChatGPT instead.
Interestingly, I’ve also been testing Kagi during the last month, and while I think it does a great job with technical searches, non-technical searches feel subpar to Google. So I think I’d rather just keep using Google for non-technical search, and use ChatGPT for technical searches instead.
Also, the fact that ChatGPT can generate code examples in the exact style, language, framework that I’m looking for is a huge advantage. As for more complex tasks and topics, ChatGPT definitely falls short. To some degree it’s very clear that the things that are difficult find with Google, are also difficult to figure out using ChatGPT (which makes a lot of sense, considering how LLMs are trained).
Next Steps
Support for multiple currencies
I think the most important thing on my “roadmap” now is to decide how to deal with multiple currencies.
One thing I’d like to figure out is how to have a dynamic (or easily configurable) “base currency”. Many expense tracking apps assume to you only have a single home currency. However, I normally “think” in whatever currency is used in the country I’m currently in. So, for example, since I’m currently in Japan I want my base currency to be JPY. However, if I’m in a different country, I want the base currency to switch to that country’s currency.
Explore other web technologies
As a “playground” for web technologies, I have some other ideas I’d like to play around with:
-
I’ve thought about the idea saving the GPS location of where expenses are added, in order to analyze and visualize where we spend money.
-
Another part I’d like to explore more is implementing an auth system using Web Authentication (WebAuthn).
-
It would also be fun to use the camera API to scan receipts and quickly capture new expenses (perhaps combined with some AI).
There are plenty of other fun things to try with this project!
Productize it
At some point it might also been fun to try to turn this project into a product that others can use. If you’re interested in something like this, feel free to let me know!