Help Scout + Stripe Integration using Custom Dynamic App
I recently started using Help Scout for one of my SaaS projects. Help Scout is my go-to solution for customer support once it scales beyond a simple inbox. The UI is simple, clean, easy to use. Their pricing is clear, and the features are solid.
I’ve previously noticed that Help Scout supports integrations for various apps and decided to look into if I could use it to provide better information about a user when they create a support ticket.
For example:
- How long have they been a user?
- Are they a paying customer?
- How long have they been a customer?
- What tier are they on?
- How much have they spent?
These are some of the things we usually look at when answering support tickets. Previously this was a manual process of looking up the user in our database, finding their Stripe customer ID, opening up Stripe and finding the customer information.
Help Scout Custom Apps
The main use-case that Help Scout Custom Apps provide is being able to pull data from a 3rd party source into the customer sidebar, which is exactly what we were looking to do.
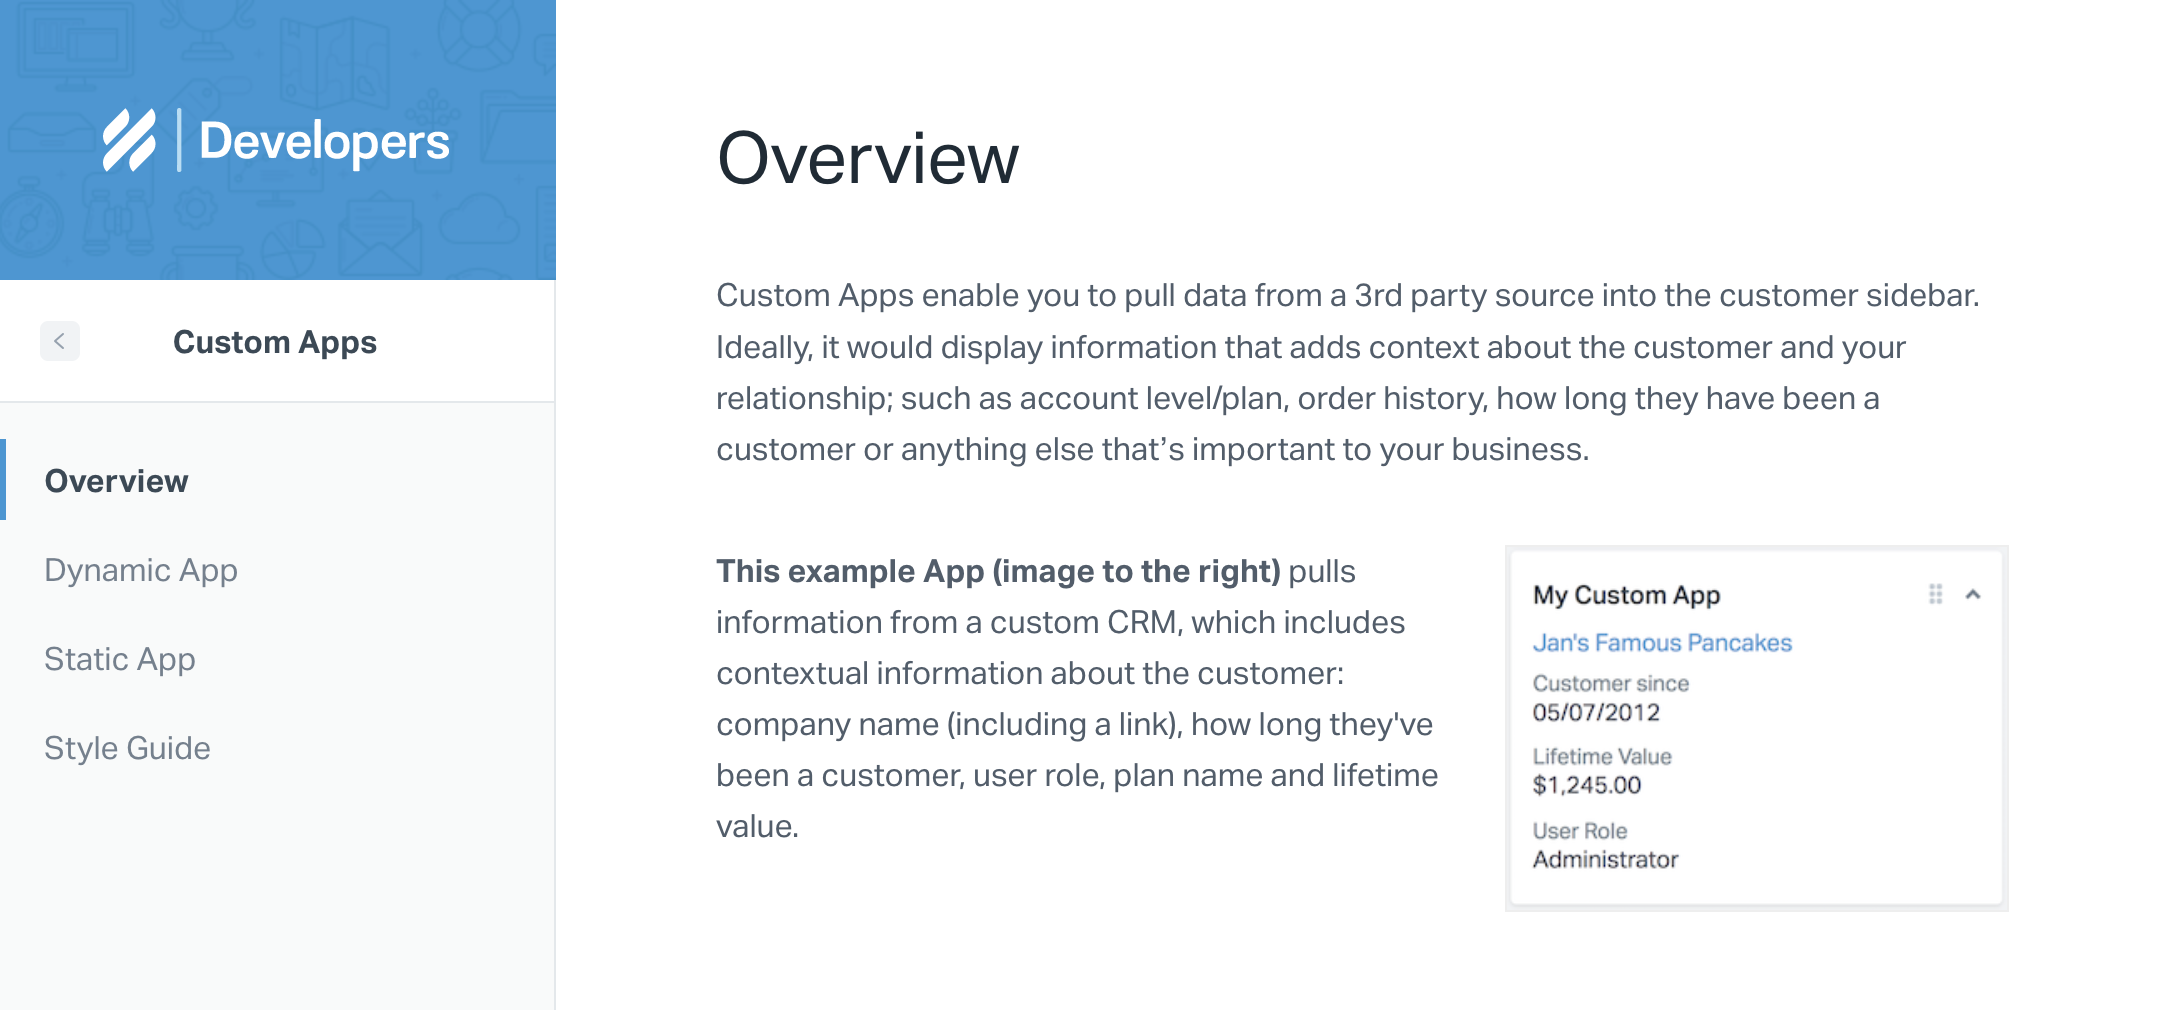
The integration process is surprisingly simple, yet very flexible since you can render whatever data and HTML that you wish. In summary you:
-
Provide a URL-endpoint that Help Scout will pull data from. This is a POST request containing information about the support ticket and customer details (such as their email address).
-
The server responds with some HTML that will be rendered in the sidebar.
Pulling user data from our database
The most obvious data to start with is user data from our own database. Here we can start by showing some simple data:
- Is the account activated?
- Did they opt-in for emails?
- Some basic usage stats
- Last login date
- Last cancellation reason
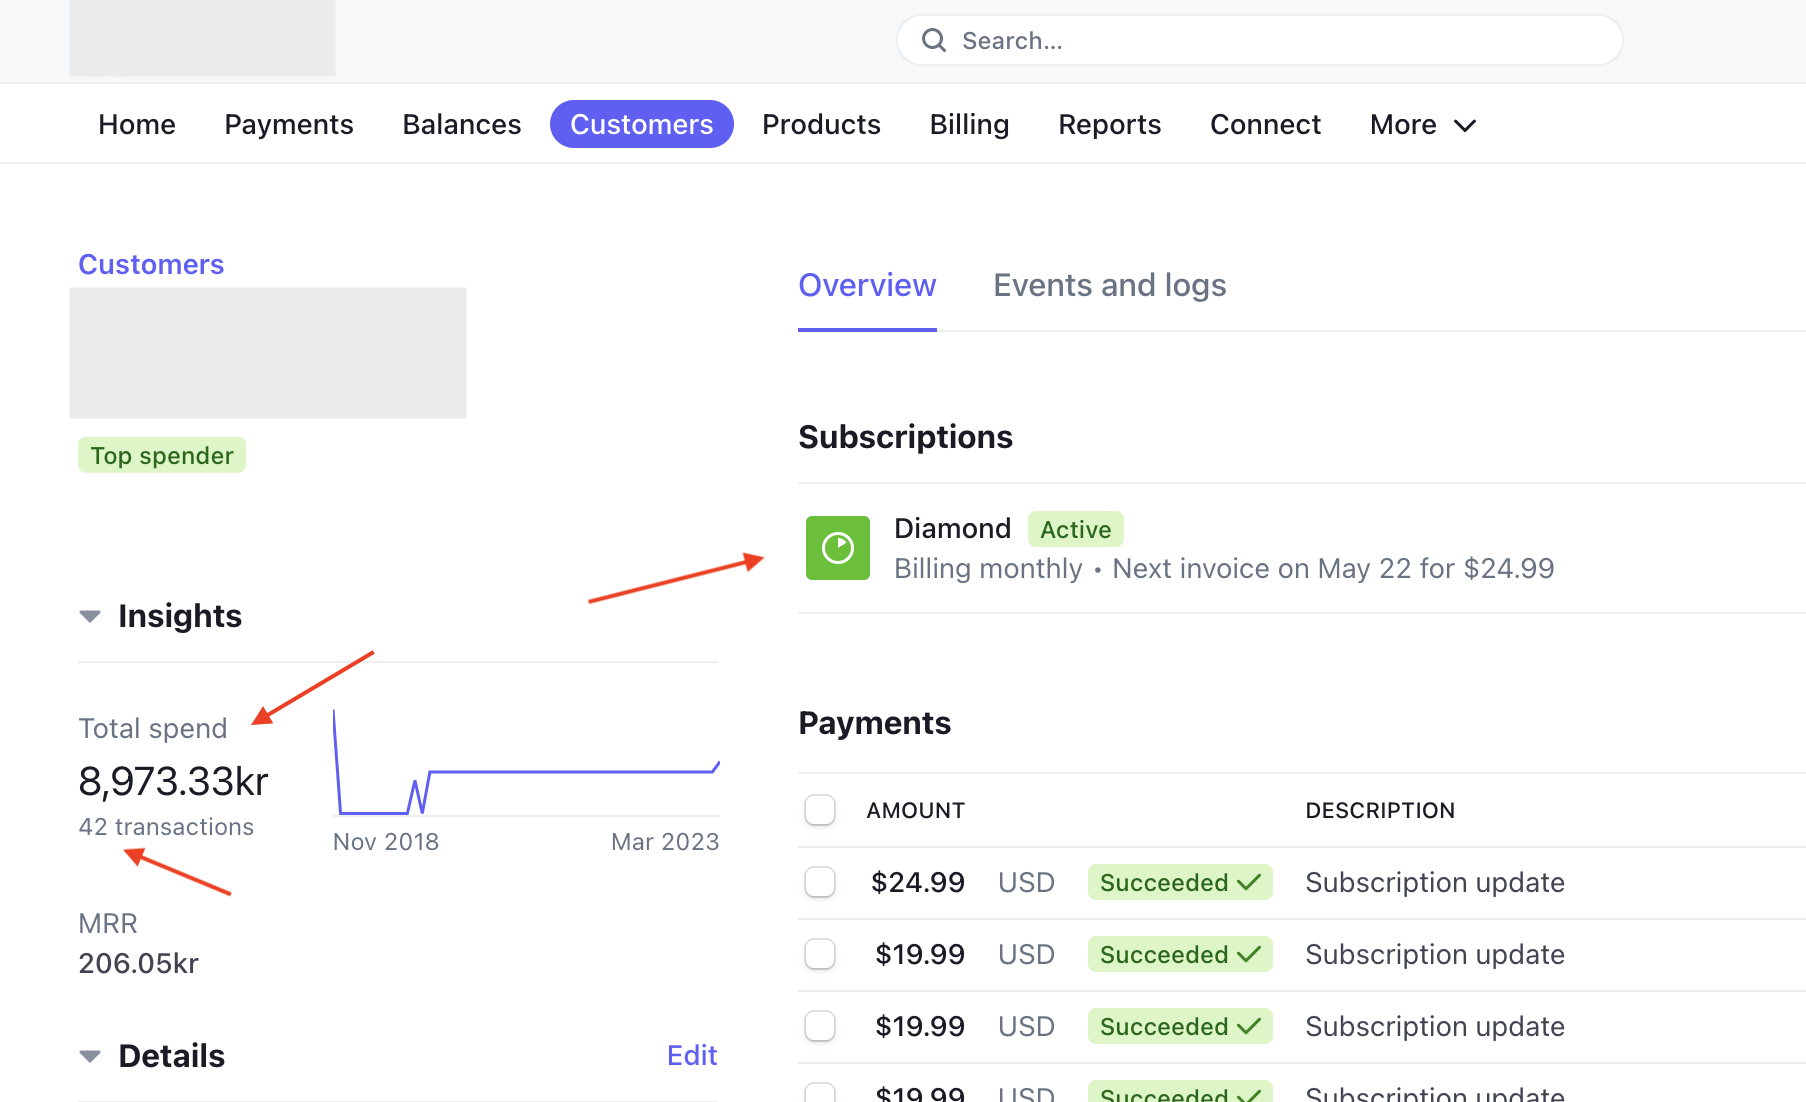
Pulling customer data from Stripe
The more interesting part comes from pulling data from Stripe. When we pull up a customer in Stripe it’s great to be able to get an overview of what plan they are on, how much they’ve spent, and if they have an unusual amount of refunds. All of this can be clearly seen from the customer page in Stripe, so this was the main thing we wanted to include in our Help Scout integration.
Lookup customers for a user
Since the only user information we get from Help Scout is the email address used to send the support ticket, we will have to make a best-effort attempt to find all customer information from this.
There could of course be edge-cases where a user creates a support ticket from a different email address not associated with their account, however that’s something we will have to live with. (If the user creates a support ticket from the Help Scout beacon while logged in, the correct email address is used automatically.)
Support Ticket email address
  -> Lookup user by email address
    -> Lookup customer by user's stripe customer id
  -> Lookup customer by email address
// Search customer by email address
const customers = await stripe.customers.search({ query: `email:"${email}"` });

// Lookup stripe customer if we found a matching user
if (user?.stripeCustomerId) {
  const customer = (await stripe.customers.retrieve(user.stripeCustomerId)) as Stripe.Customer;
  customers.data.push(customer);
}
Calculate customer spend
Unfortunately there is no pre-computed total spend provided by the Stripe API. So we had to write a simple function to compute this by fetching all of the charges for the customer, and sum up the amount captured, the amount of refunds, and the number of transactions.
Note that the use of for await enables us to easily paginate through all of the charges (if there are more than 100).
interface CustomerSpend {
  amount: number;
  count: number;
  refunds: number;
}

async function getCustomerSpend(customerId: string): Promise<CustomerSpend> {
  let amount = 0;
  let count = 0;
  let refunds = 0;
  for await (const charge of stripe.charges.list({ customer: customerId, limit: 100 })) {
    if (charge.status === 'succeeded') {
      amount += charge.amount_captured;
      count++;
    }
    if (charge.refunded) {
      refunds += charge.amount_refunded;
    }
  }
  return { amount, count, refunds };
}
Subscription summary
Once we’ve found all matching customer objects we can generate a summary of each customer and their latest subscription.
- How long they have been a customer
- How long they have been subscribed
- Country and currency
- Subscription tier and status
const { amount, count, refunds } = await getCustomerSpend(cus.id);
const subscriptions = await stripe.subscriptions.list({ customer: cus.id, status: 'all' });
if (subscriptions.data.length > 0) {
  const sub = subscriptions.data[0];
  return {
    id: cus.id,
    email: cus.email,
    customerSince: moment.unix(cus.created).fromNow(true),
    subscribedSince: moment.unix(sub.created).fromNow(true),
    name: cus.name,
    currency: cus.currency?.toUpperCase(),
    country: cus.address?.country,
    cancelled: sub.cancel_at_period_end ? moment.unix(sub.current_period_end).format('MMM D') : null,
    status: sub.status,
    product: sub.items.data[0]?.price.metadata.product,
    amount,
    refunds,
    count,
    subscriptions: subscriptions.data.length,
    refcode: sub.metadata.refcode,
  };
}
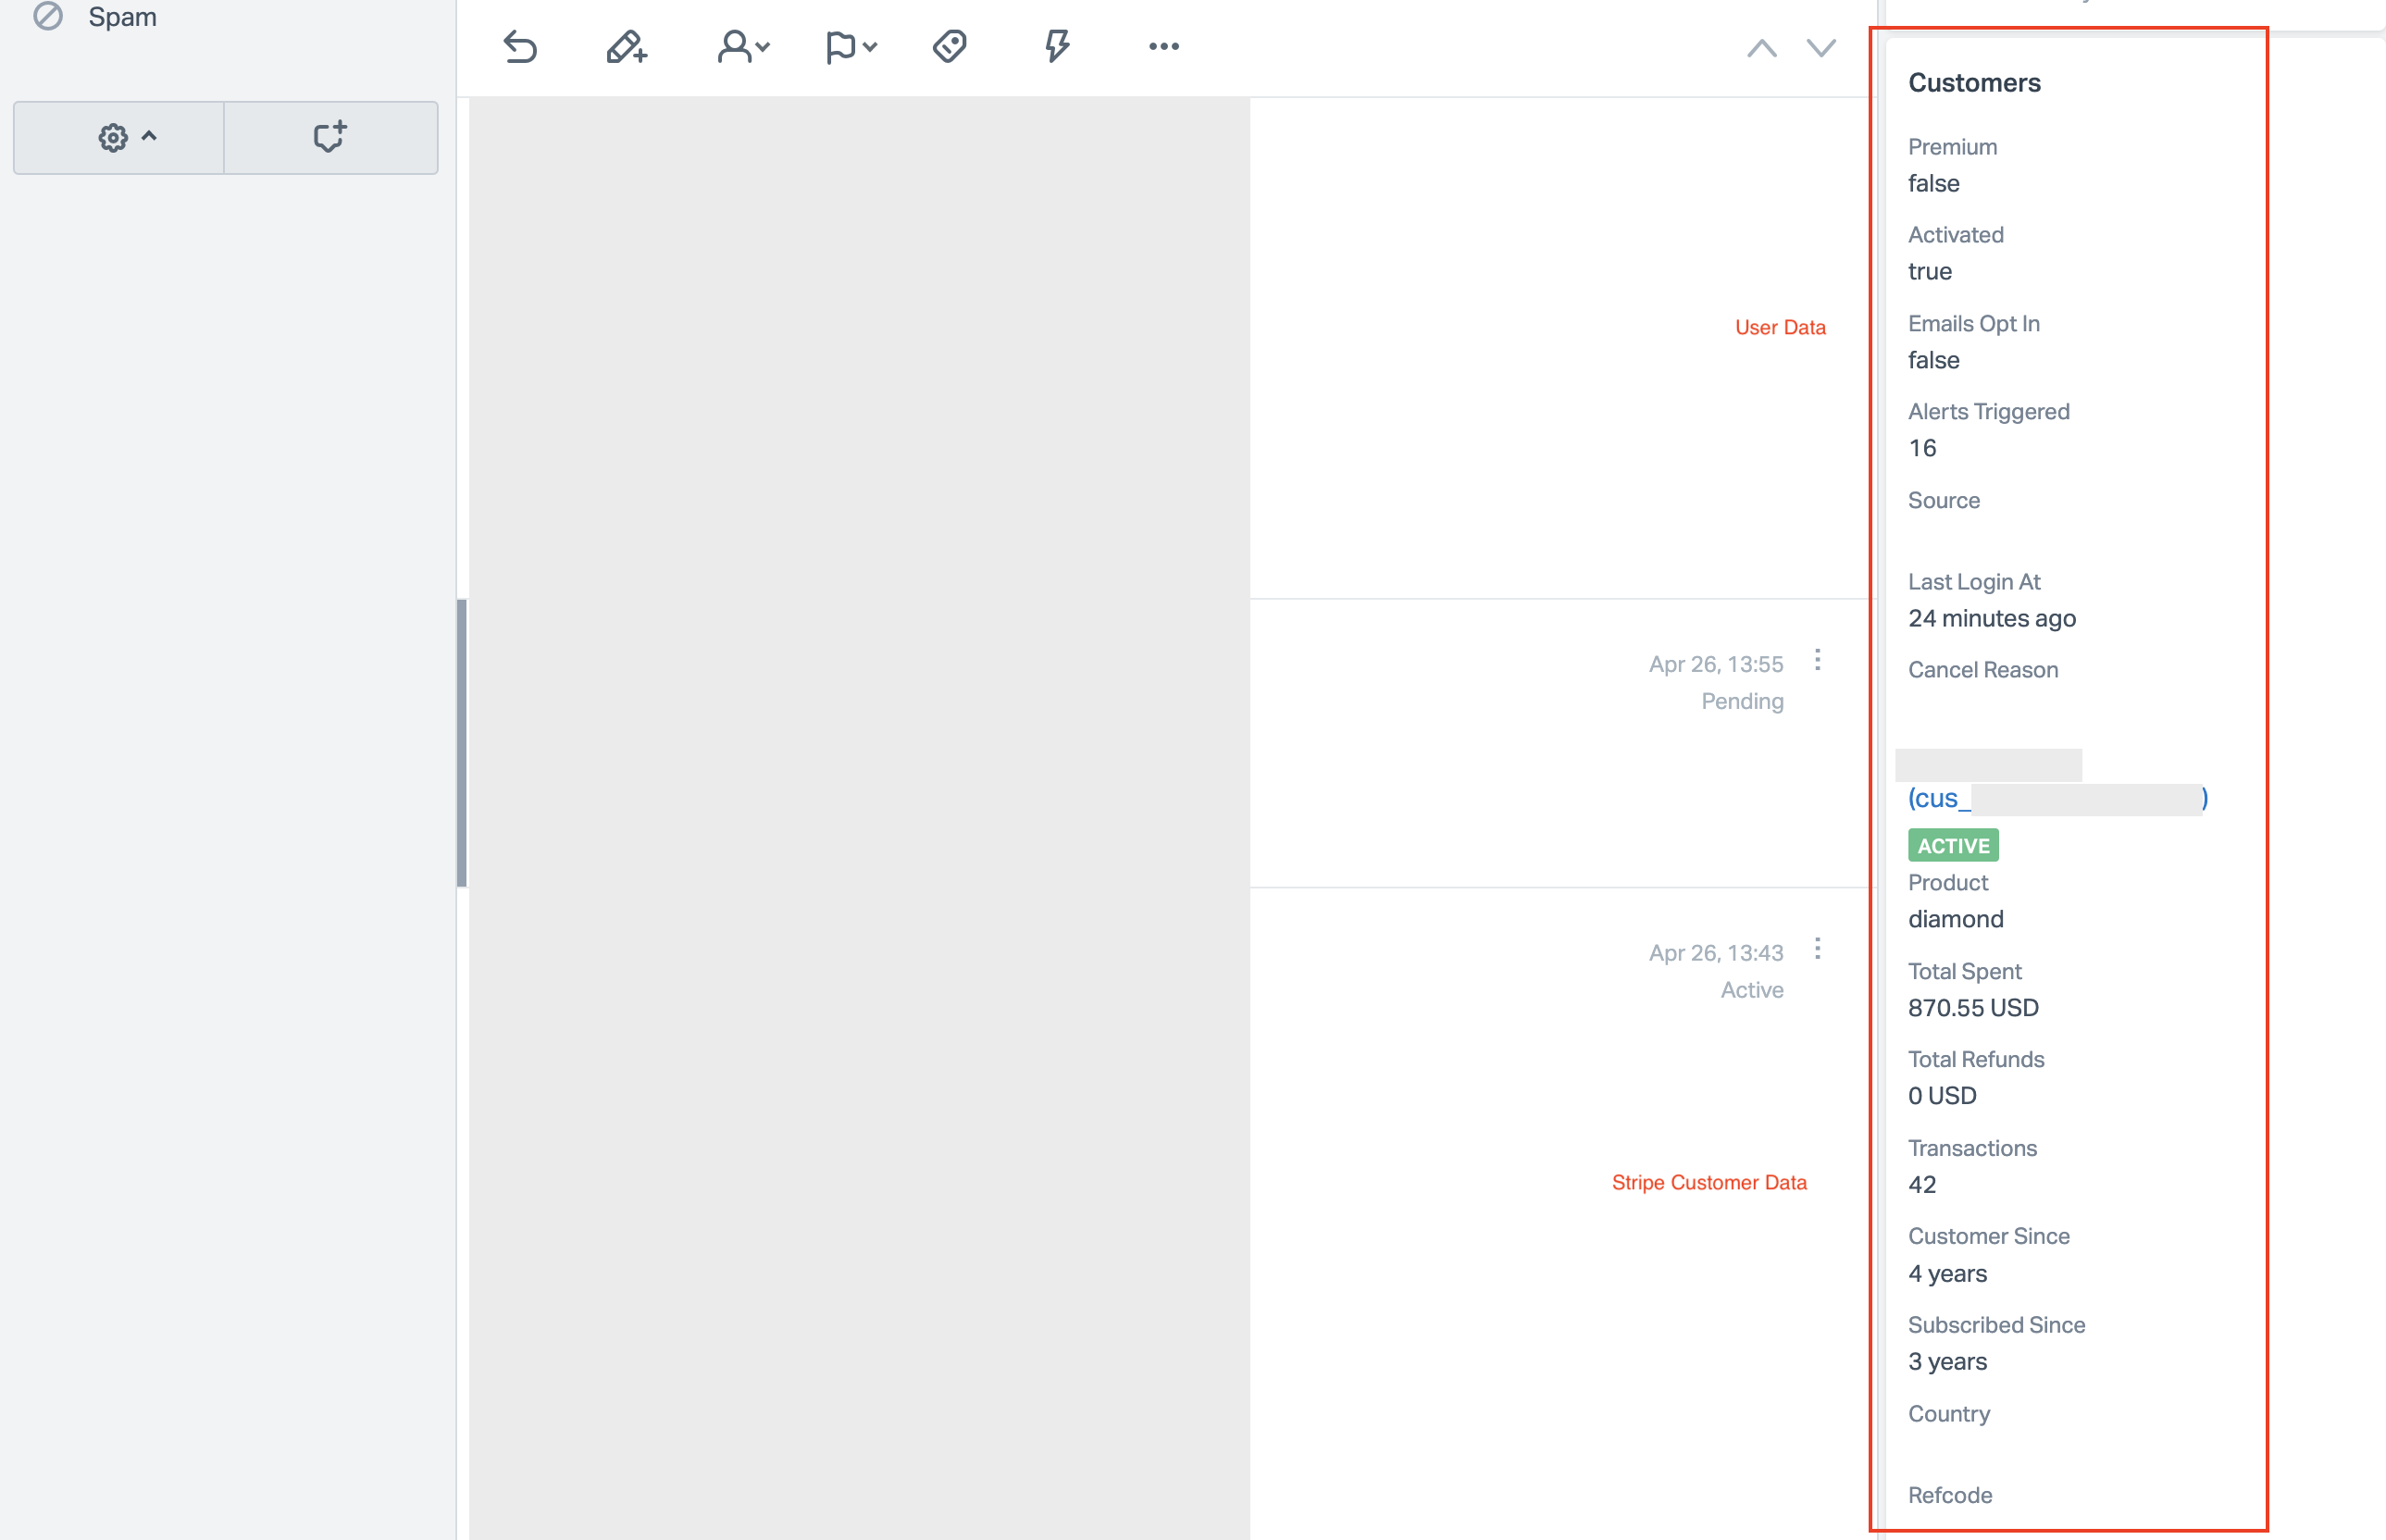
Rendering the HTML
From this we can render the HTML that we then return to Help Scout. Since we’re using an Express server with pug rendering we can easily setup a template page for this. Help Scout provides a nice selection of pre-defined CSS styles that can be used.
mixin item(label, text)
  li(class="c-sb-list-item")
    span(class="c-sb-list-item__label") #{label}
      span(class="c-sb-list-item__text") #{text}

//- User Information
ul(class="c-sb-list c-sb-list--two-line")
  +item('Premium', user.isPremium)
  +item('Activated', user.isActivated)
  +item('Emails Opt In', user.emailsOptIn)
  +item('Alerts Triggered', user.numAlertsTriggered)
  +item('Source', user.source)
  +item('Last Login At', user.lastLoginAt)
  +item('Cancel Reason', user.cancellationReason)

//- Stripe Customer Information
each customer of customers
  h4: a(href=`https://dashboard.stripe.com/customers/${customer.id}`) #{customer.name || customer.email} (#{customer.id})
  if customer.status == 'active'
    if customer.cancelled
      span.badge.red Cancels #{customer.cancelled}
    else
      span.badge.green Active
  else
    span.badge.red #{customer.status}
  ul(class="c-sb-list c-sb-list--two-line")
    +item('Product', customer.product)
    +item('Total Spent', `${customer.amount / 100} ${customer.currency}`)
    +item('Total Refunds', `${customer.refunds / 100} ${customer.currency}`)
    +item('Transactions', customer.count)
    +item('Customer Since', customer.customerSince)
    +item('Subscribed Since', customer.subscribedSince)
    +item('Country', customer.country)
    +item('Refcode', customer.refcode)
Help Scout expects a JSON response with the HTML provided as a string. So, rather than invoking res.render(...) we instead call req.app.render(...) to generate the HTML, which we can then return in a JSON response.
router.post('/helpscout', wrap(async (req, res) => {
  const email = req.body.customer.email as string;
  const user = await lookupUserSummary(email);
  const customers = await Billing.lookupCustomerSummary(user?.stripeCustomerId, email);
  req.app.render('helpscout', { user, customers }, (err, html) => {
    if (err) {
      res.json({ html: err.message });
    } else {
      res.json({ html });
    }
  });
}));
Securing your endpoint
Obviously you’ll want to make sure the Help Scout endpoint isn’t publicly accessible by anyone, which would lead to leaking user data. The easiest solution would be to add an “access token” to your callback URL, for example:
/api/helpscout?access-token=<some-long-random-string-here>
Alternatively you can provide a secret key to Help Scout, which will be used to generate a signature of the request. You can then verify the signature to make sure the request is valid. This requires a little bit more work, especially since we need access to the raw JSON body.
const HELP_SCOUT_SECRET = process.env.HELP_SCOUT_SECRET;

// Add rawBody to the request
app.use(bodyParser.json({
  verify: function (req: express.Request, res, buf) {
    const url = req.originalUrl;
    if (url.startsWith('/api/helpscout')) {
      req.rawBody = buf.toString();
    }
  },
}));

// Verify signature
router.use('/api/helpscout', (req, res, next) => {
  const signature = req.header('x-helpscout-signature');
  if (!req.rawBody) {
    res.status(400).send('Missing body');
  } else if (signature) {
    const hash = crypto.createHmac('sha1', HELP_SCOUT_SECRET).update(req.rawBody).digest('base64');
    if (hash == signature) {
      next();
    } else {
      res.status(400).send('Invalid signature');
    }
  } else {
    res.status(400).send('Missing signature');
  }
});
Demo
It’s quite simple, but the result was immediately useful. As soon as a user creates a support ticket we get a nice summary of all their data. Even just having a direct link from a Help Scout ticket to the Stripe customer object is such a great feature, making it easy to deal with cancellations or refund requests.