One Week Build: BrowserFrame 2.0
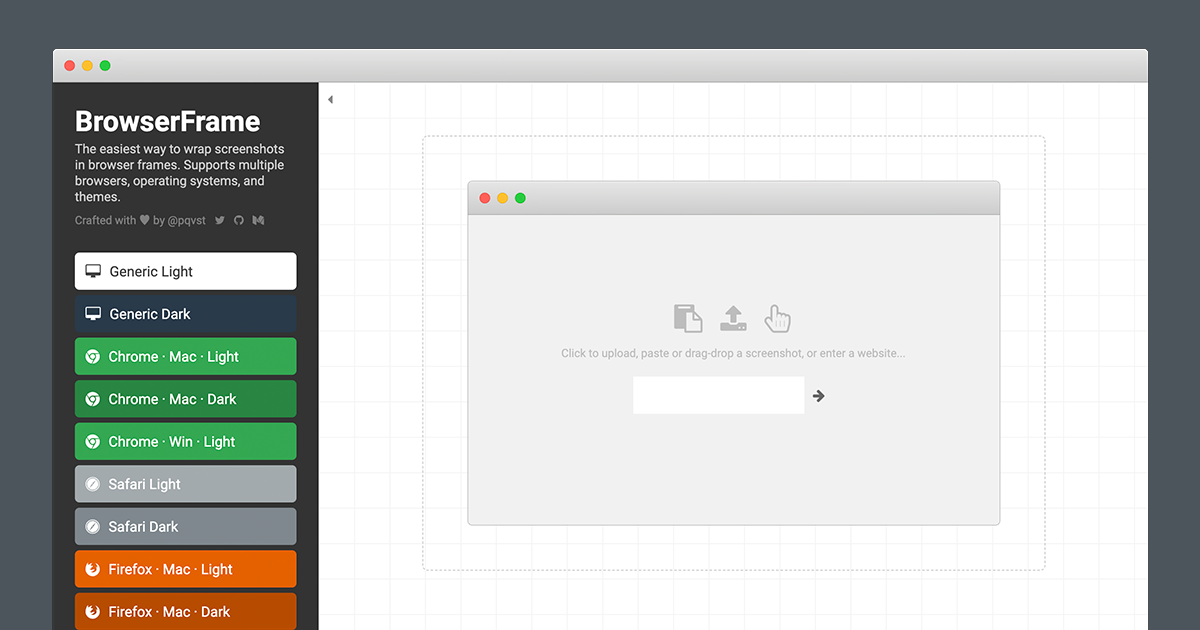
About 3 years ago I built and launched BrowserFrame.com — a free tool that wraps screenshots in different browser frames (great for mockups and landing pages). It was time to give it a much needed update.
What’s New
1. New browser frames & High DPI
All frames have been updated to the latest browser versions (Chrome, Firefox, Safari, Opera, Edge, and Internet Explorer) including dark-mode. A new “Generic” browser frame has been added as well. All browser frames are no generated in high DPI, and the site works well with Retina displays.
2. Fast client-side rendering
The first version of BrowserFrame performed all rendering server-side. The main benefit of this was having access to a good image processing library for stitching together the frames. However, the downside to this was that it consumed a significant amount of CPU and the rendering cycle (upload screenshot, generate frame, download image) took a bit longer than I preferred.
BrowserFrame 2.0 now performs all rendering client-side using some neat canvas tricks (more on this below). This means that rendering is now much faster.
3. Drag-drop and paste image from clipboard
Instead of just a classic “file upload”, BrowserFrame 2.0 now supports drag-drop and pasting images from the clipboard.
4. Rendering options
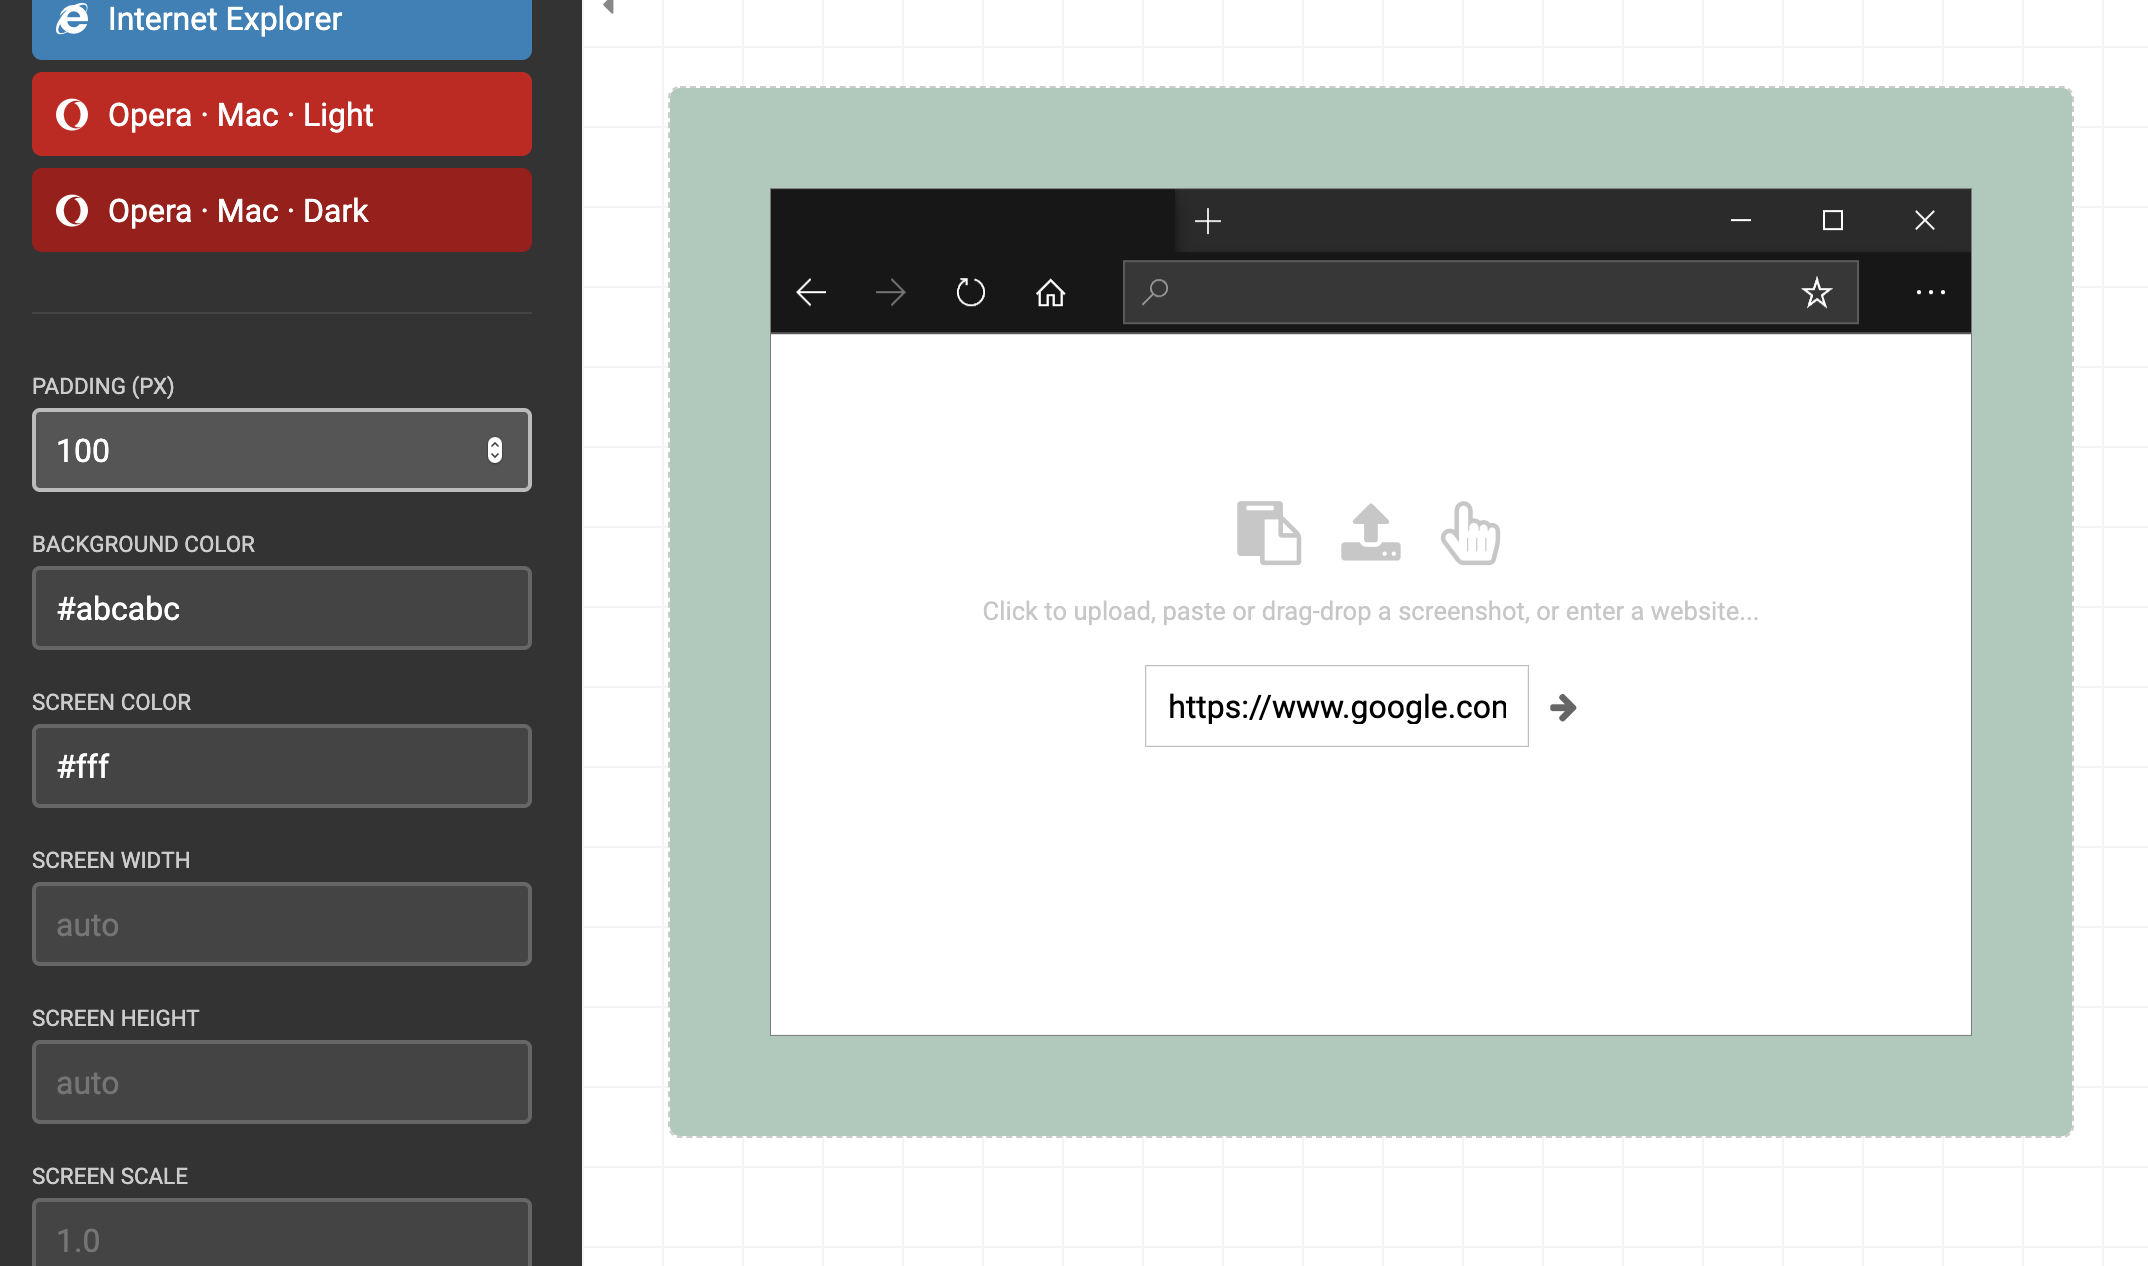
With client-side rendering, it is now easier to play around with rendering options. It’s now possible to add padding around the frame, background color, screen color, and more. It’s also possible to provide custom dimensions, which makes it easy to generate empty frames for any size.
Going Deep
Downloading a Canvas as a PNG
The first problem I had to tackle was how to generate and download a PNG from a client-side canvas. Thanks to this helpful codepen I figured out that you can generate a data URL from the canvas and then attach that to an anchor tag. Also, setting the “download” attribute tells the browser to download the file with a specific filename.
var canvas = document.getElementById('#canvas');
var a = document.getElementById('#save');

a.download = 'filename.png';
a.href = canvas.toDataURL('image/png;base64');
This works great until the resulting image becomes too big. In my case this stopped working when the resulting base64 image was around 2 million characters long (hitting the attribute size limit in Chrome).
Luckily I found a better solution. Instead of generating a data URL, you can convert the canvas into a Blob, which you can then use to generate a unique blob link to the image that the browser manages for you. Very neat!
var canvas = document.getElementById('#canvas');
var a = document.getElementById('#save');

canvas.toBlob(function(blob) {
  a.download = 'filename.png';
  a.href = URL.createObjectURL(blob);
}, 'image/png');
The result looks like this:

Mastering globalCompositeOperation
Generating browser frames with rounded corners (for mac) is actually quite difficult. Previously I solved this by using alpha masks to “cut” the corners off of the uploaded screenshot. However, this isn’t very simple do with a Canvas. After quite a few hours I managed to come up with a working solution by layering the rendering of the different parts and adjusting the globalCompositeOperation flag.
Let’s have a look at the rendering process in more detail.
- First, the main frame “slices” are rendered (top-left, top-center, top-right, left, right, bottom-left, bottom-center, bottom-right). Notice the white rounded corner pieces in the bottom corners.
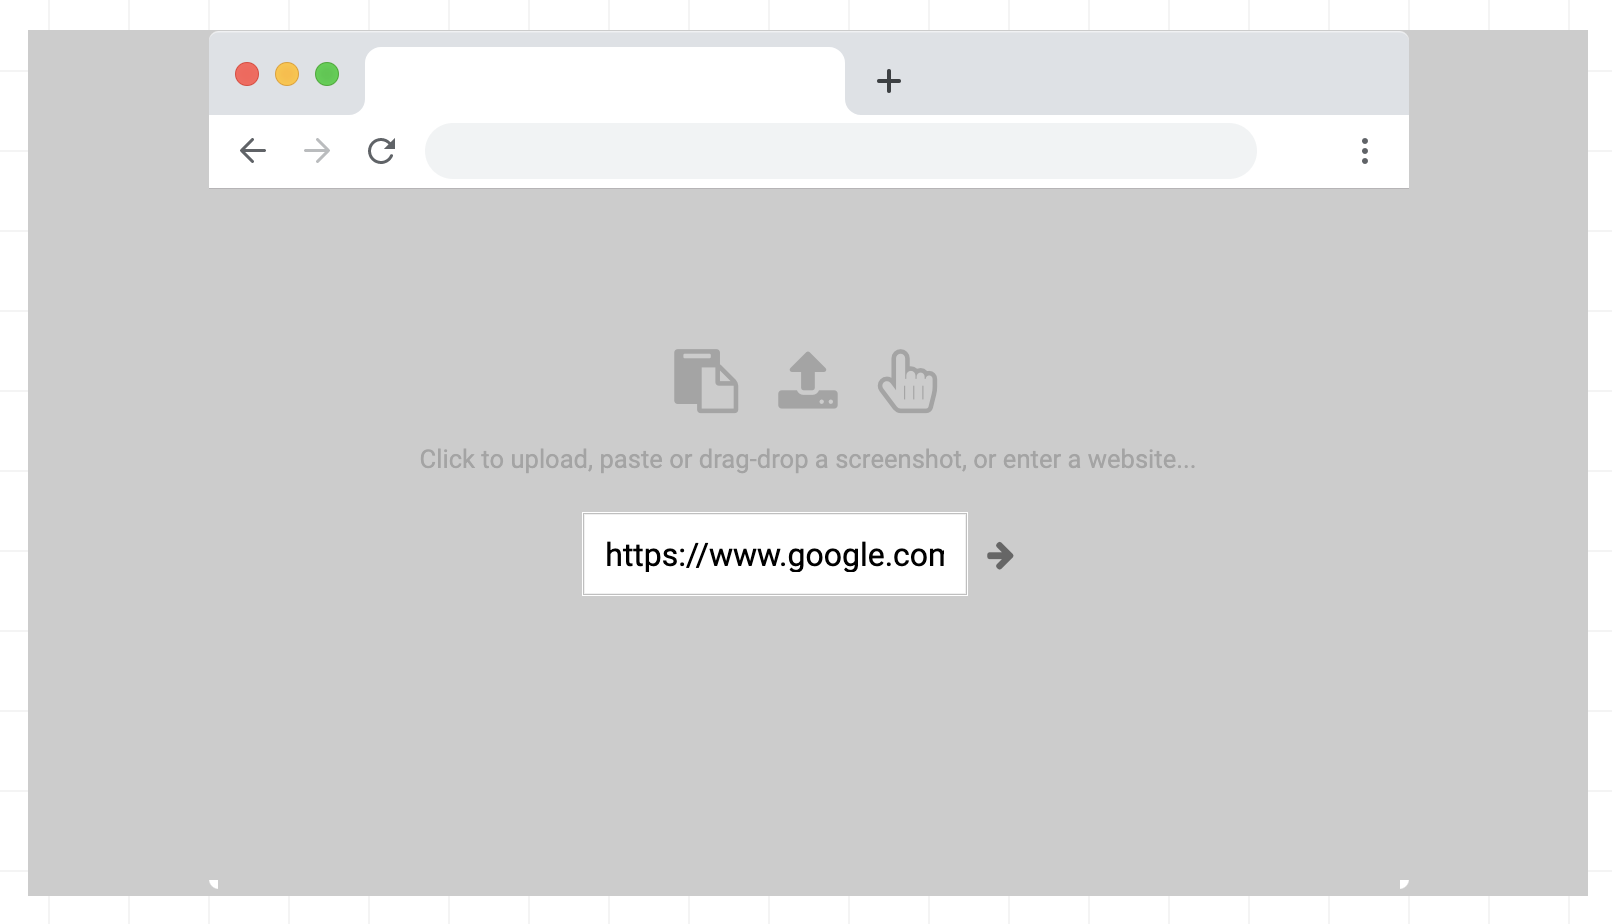
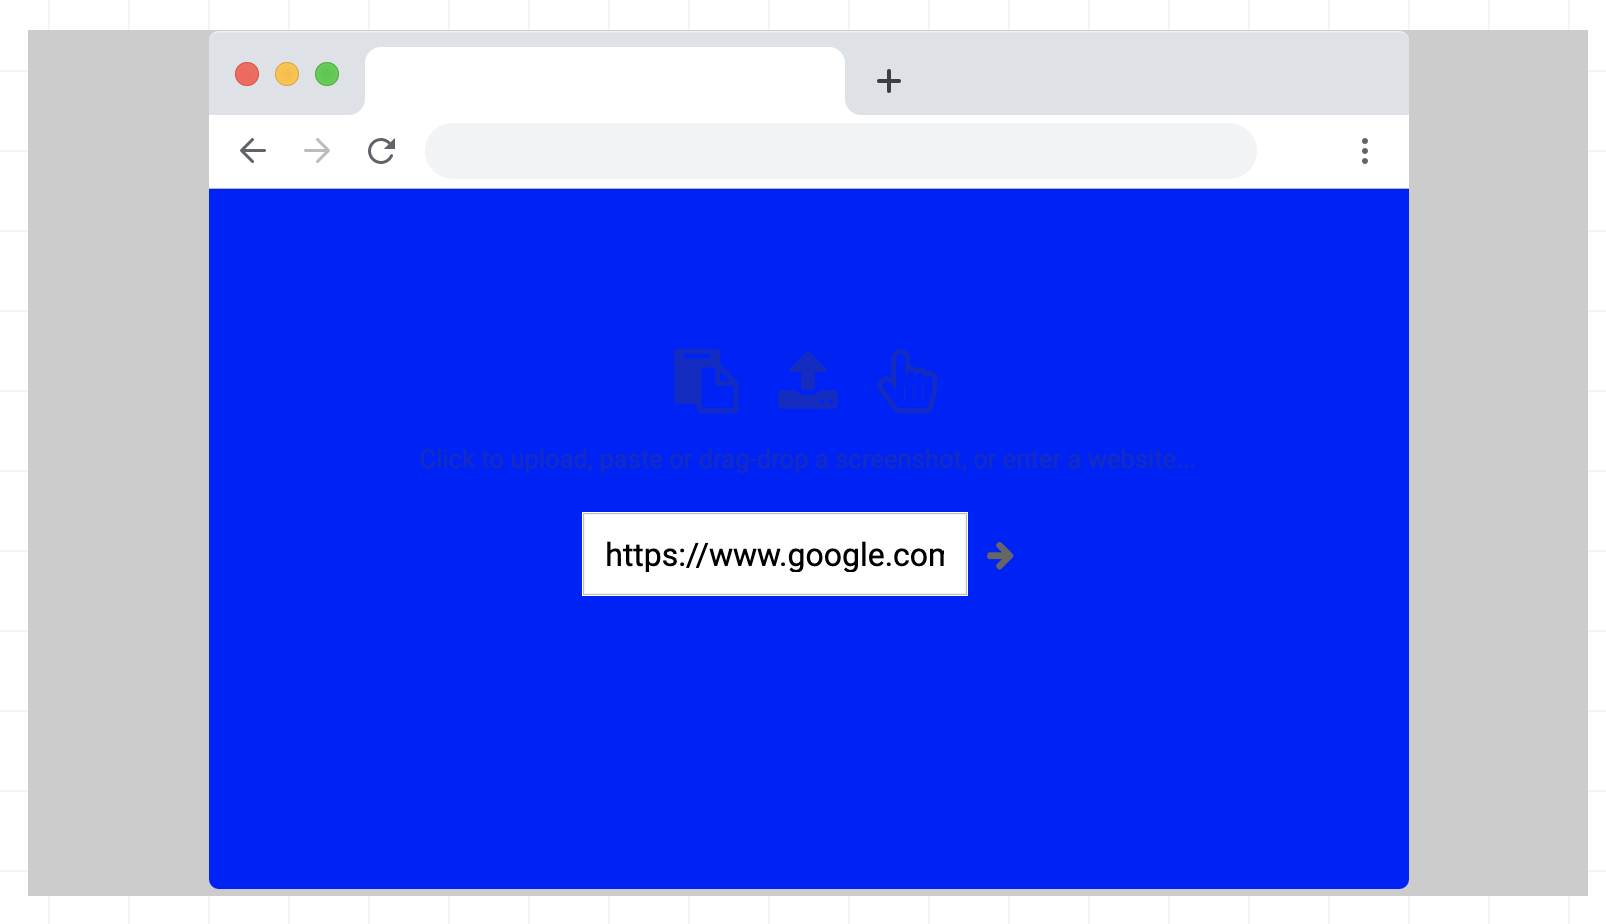
- Next I fill in all transparent regions inside the screen area (basically the entire screen area, except the bottom corner pieces). The color doesn’t matter, as long as it isn’t transparent.
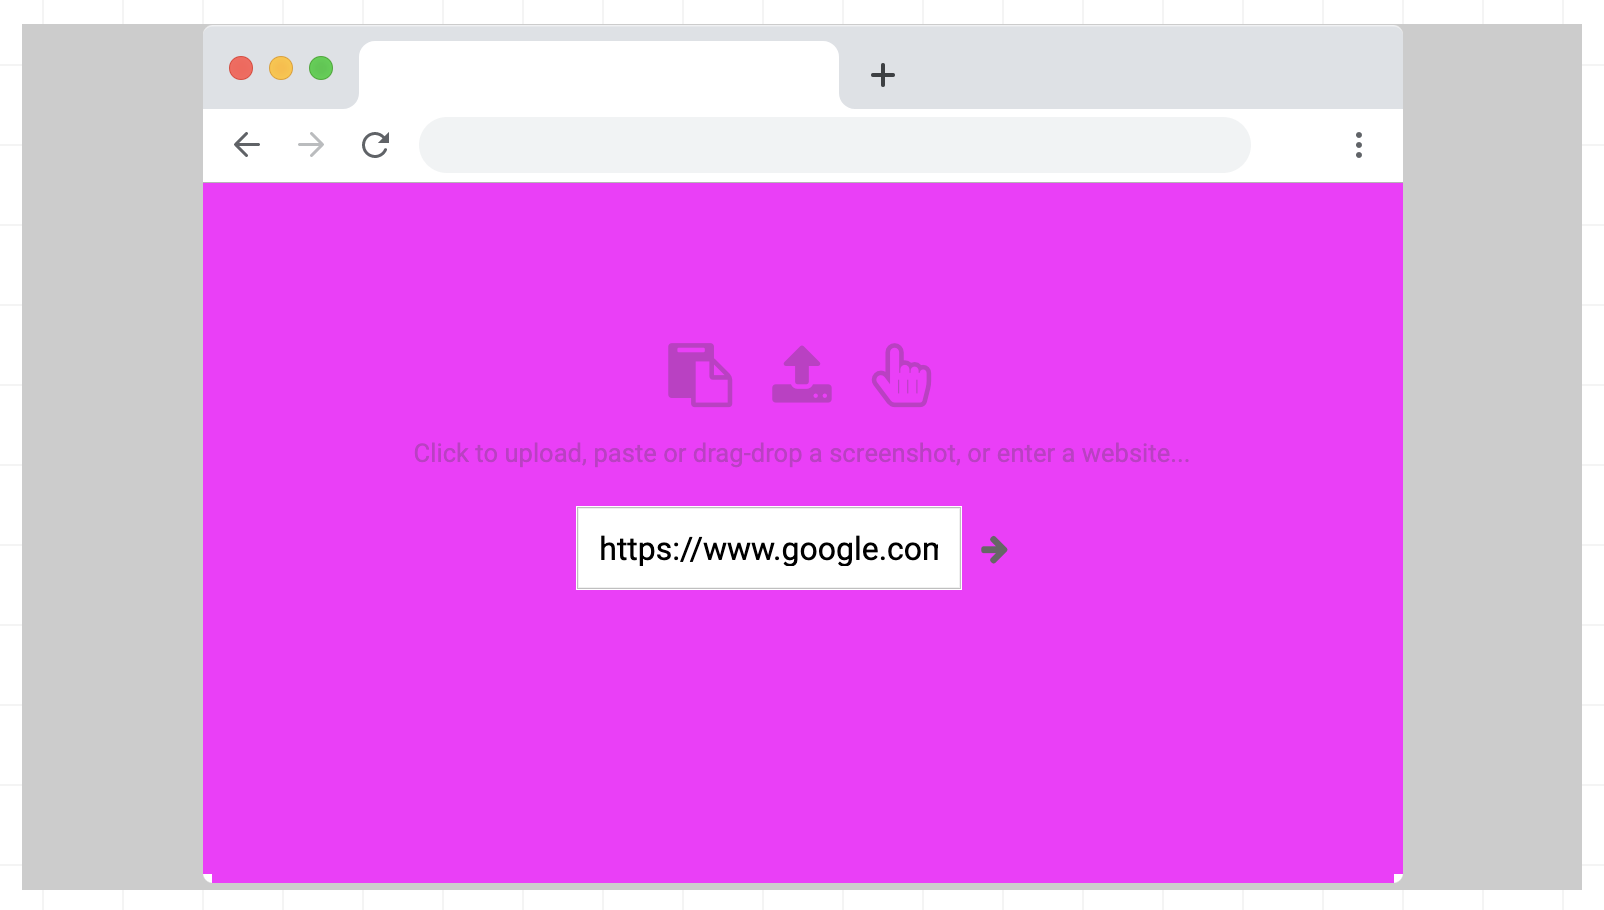
- Next the screen area is filled in with a color if the user has specified a screen color (in this example, blue). This is done with globalCompositeOperation set to source-atop, which enables us to cut off the corner areas, matching the frame slices. With source-atop the new content will only be added to existing non-transparent content, basically giving us a mask!
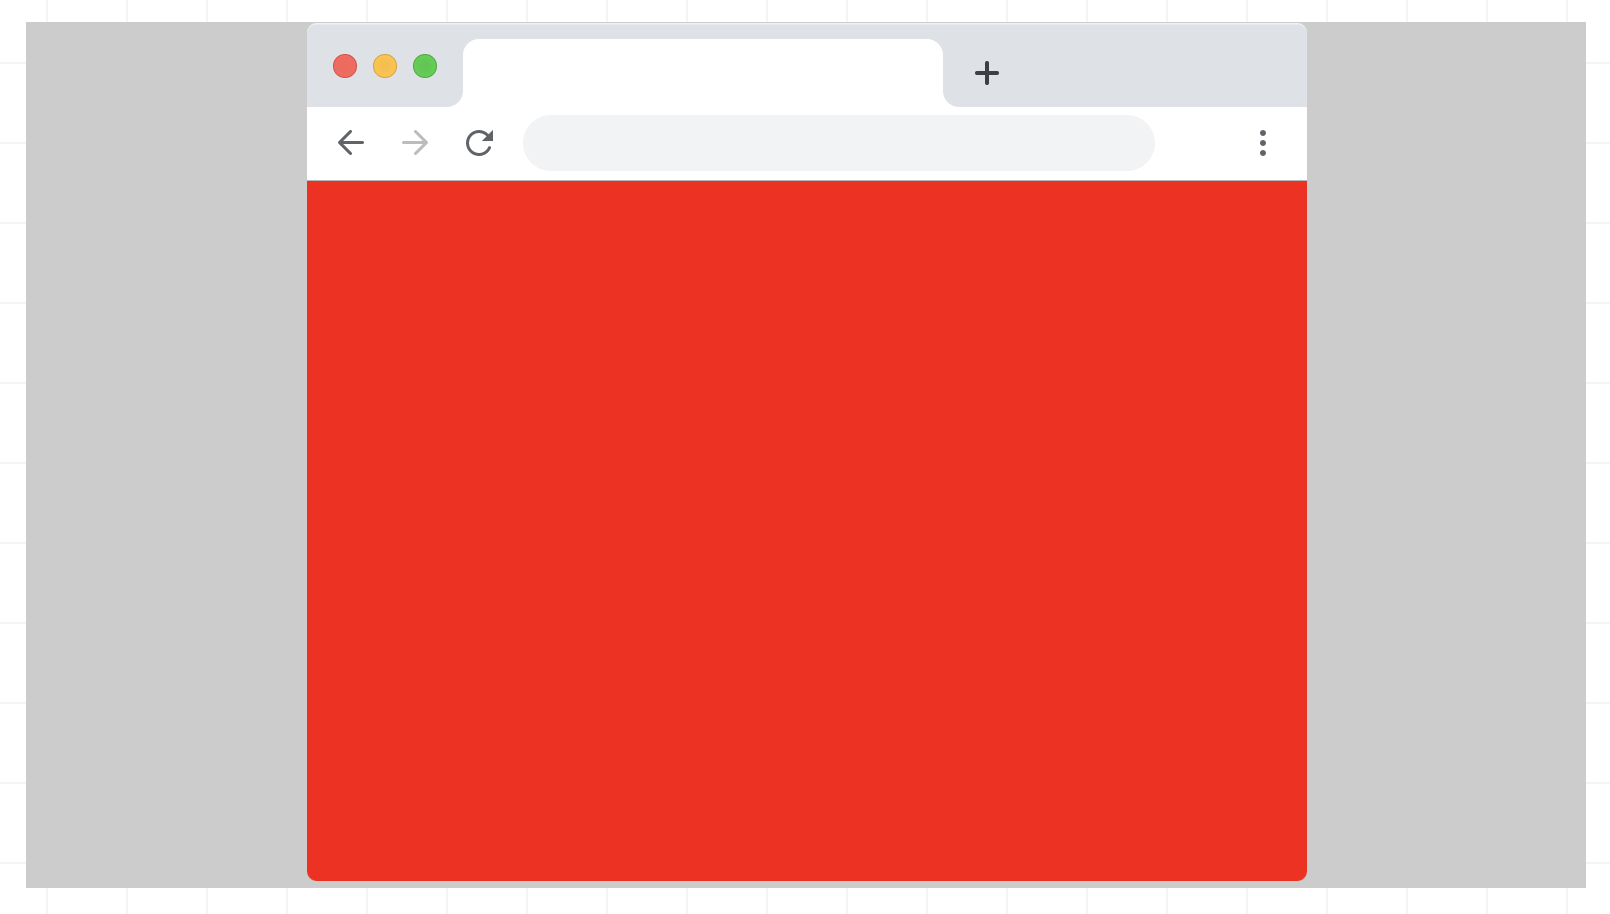
- Now the user’s screenshot image (in this case just a red image) is added to the canvas. Again, this uses source-atop so that the corner areas are cut off to match the frame.
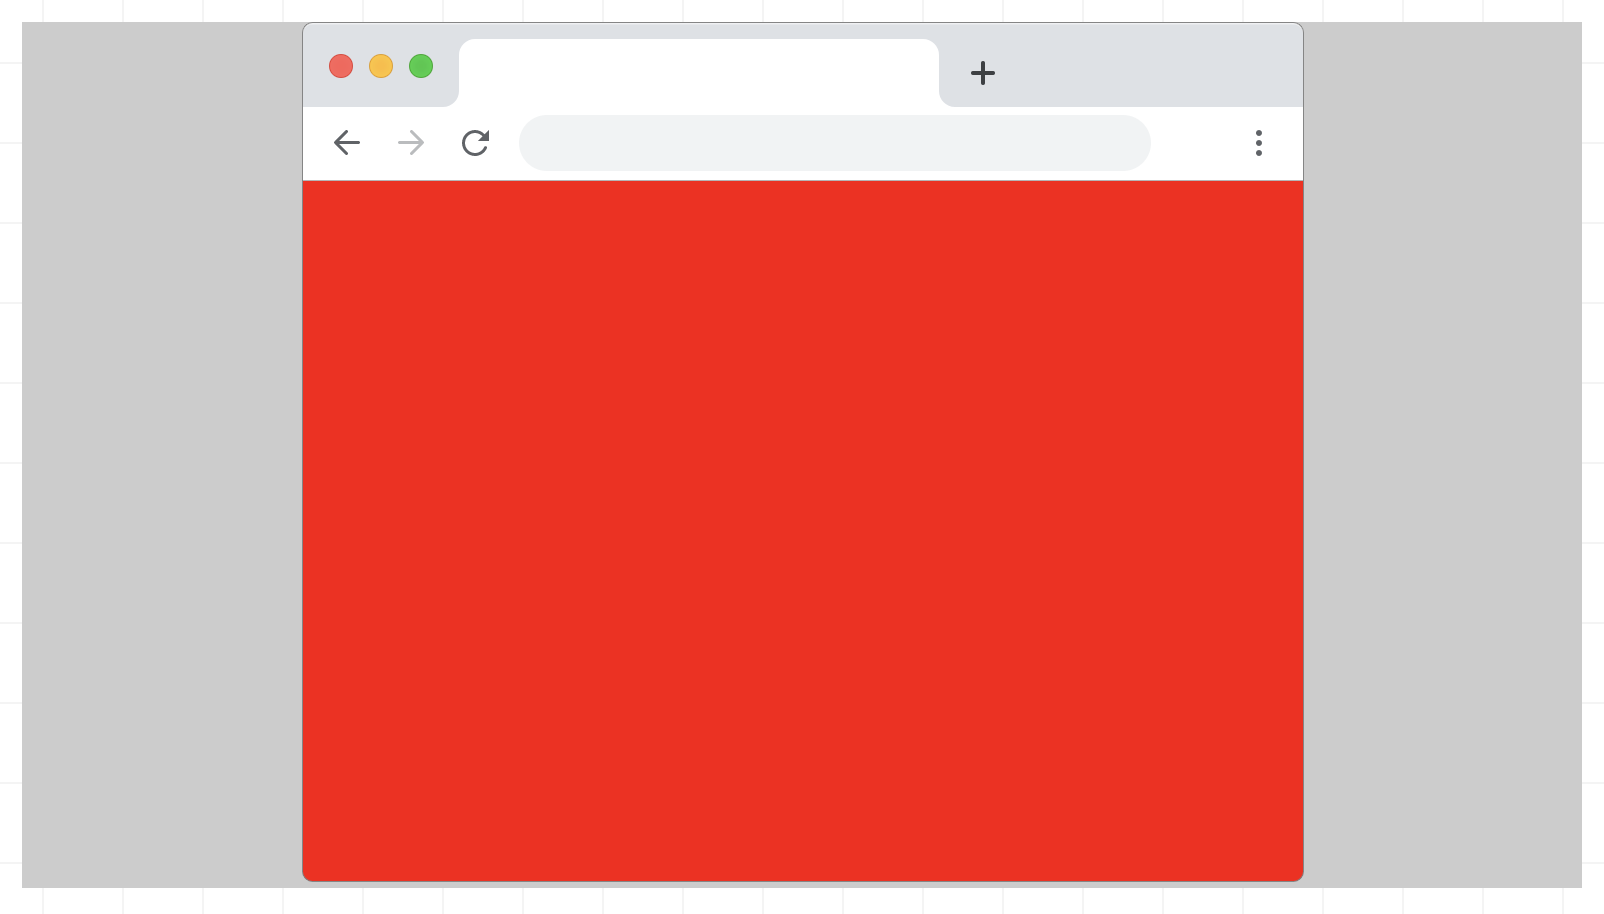
- Now the slight outline border is added. These are also slices but are now rendered using globalCompositeOperation set to destination-over so that they appear behind all existing content. These can’t be rendered earlier since that would stop us from using the source-atop trick earlier.
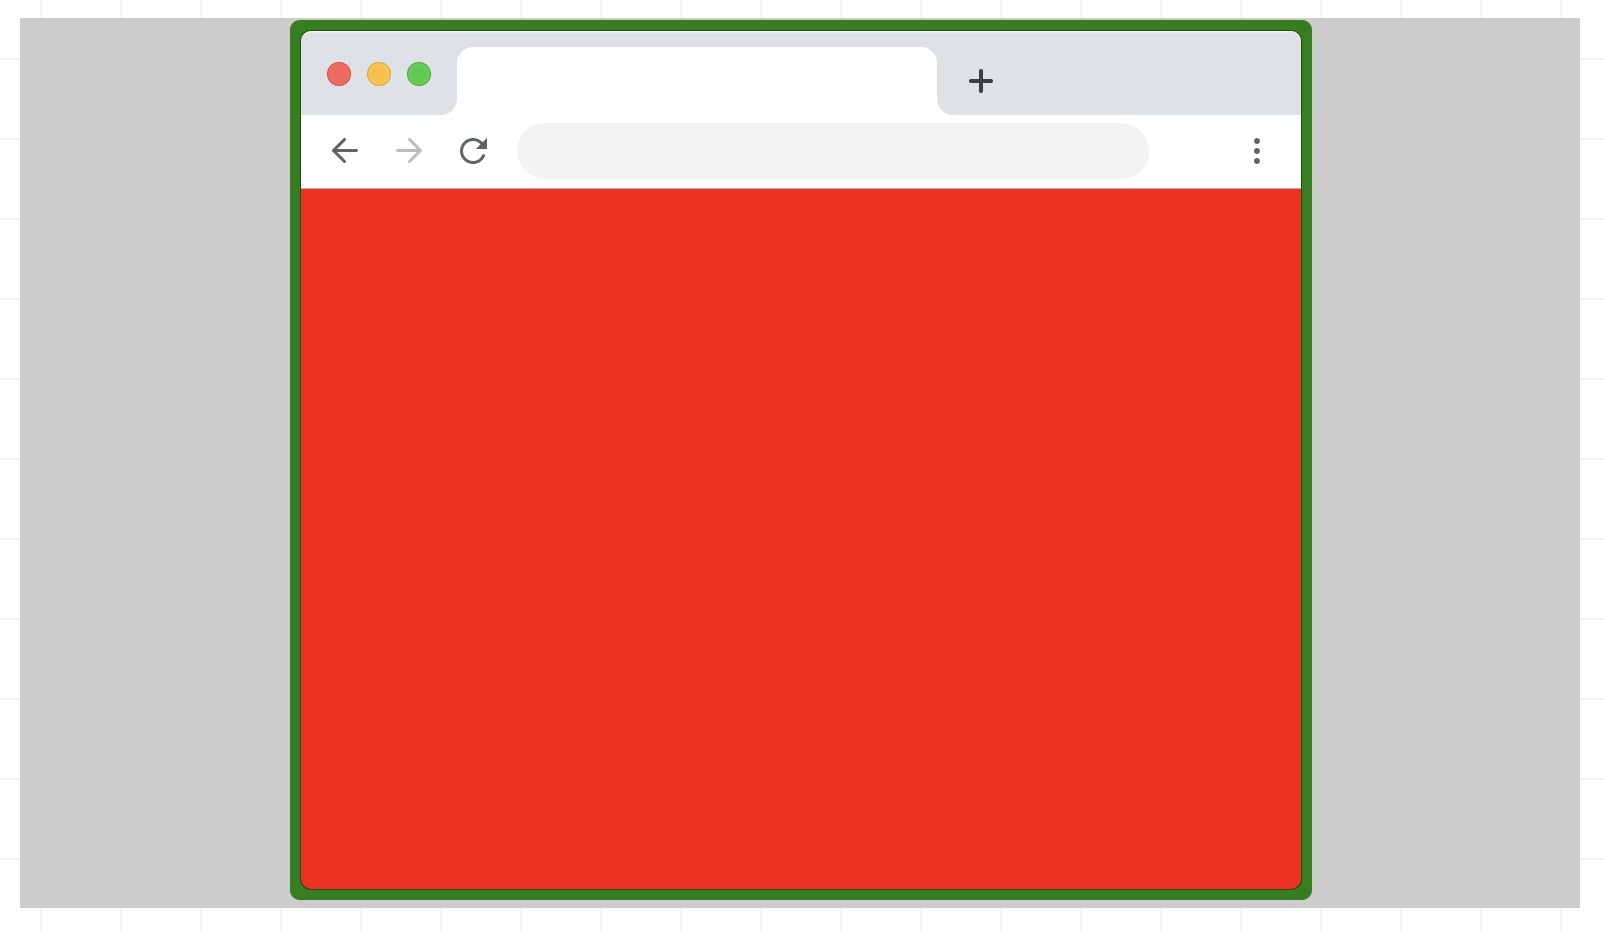
- Finally, if the user has added padding and a background color (in this case 10px of green), this is added as well, again using destination-over to appear behind all existing content.
- For more details, check out Mozilla’s developer resource on globalCompositeOperation. They have great examples showing all of the different modes.
https://developer.mozilla.org/en-US/docs/Web/API/CanvasRenderingContext2D/globalCompositeOperation
Future Ideas
-
Interactive resizing/positioning of screenshots.
-
Option to add a shadow and other effects.
-
CLI tool
Give it a try!
https://browserframe.com
https://www.producthunt.com/posts/browserframe-2-0