What Does Fine-Dining and Node.js Have in Common?
Programming is useful for many things – including helping you make reservations at difficult places like David Chang’s Momofuku Ko. Here is what I did…
A few months ago I booked my flight for a 3 week trip to New York. As a “foodie” I immediately started looking for my splurge restaurant visit. Of course New York has a great selection, but I wanted something “fun”. On a previous trip to New York I visited wd~50 – which was an amazing experience, so I wanted to find something similar. After some intense Googling I decided that the two Michelin star Momofuku Ko was “the one”.
](/assets/img/what-does-fine-dining-and-node-js-have-in-common/ZEt0r8pyzkFHEupXPttwkw.jpeg) http://ny.eater.com/2014/11/26/7271437/momofuku-ko-suttonomics
http://ny.eater.com/2014/11/26/7271437/momofuku-ko-suttonomics
Step 1 – How to make a reservation
The first step of course was to figure out how to get a reservation. It’s a small place with 12 counter seats so I wasn’t expecting it to be easy. I read some Yelp reviews and my take away was that they open reservations 10 days in advance and they apparently get filled up in a matter of minutes. Shouldn’t be too difficult though, I’ll have lots opportunities to try to get a reservation during my 3 week visit.
Fast forward to about 1 week before my trip. I go to the Momofuku reservation site and I realize that:
-
The reservation policy is 15 days, not 10 days…
-
All reservations for the first week of my trip are already booked.
-
Momofuku Ko is only open Wed – Sun
That leaves me with only two possible slots, which feels a bit risky. So, what are my options. Either I manage to get a reservation on one of those days – or I manage to find a reservation cancellation…
canceled reservations return to the reservation system. there is no wait list and we do not allow walk-ins.
Of course, this leads the natural conclusion that I have to write a program that automatically logs into the reservation system, looks for any available slot, and notifies me as soon as it finds one. Simple.
Step 2 – Research
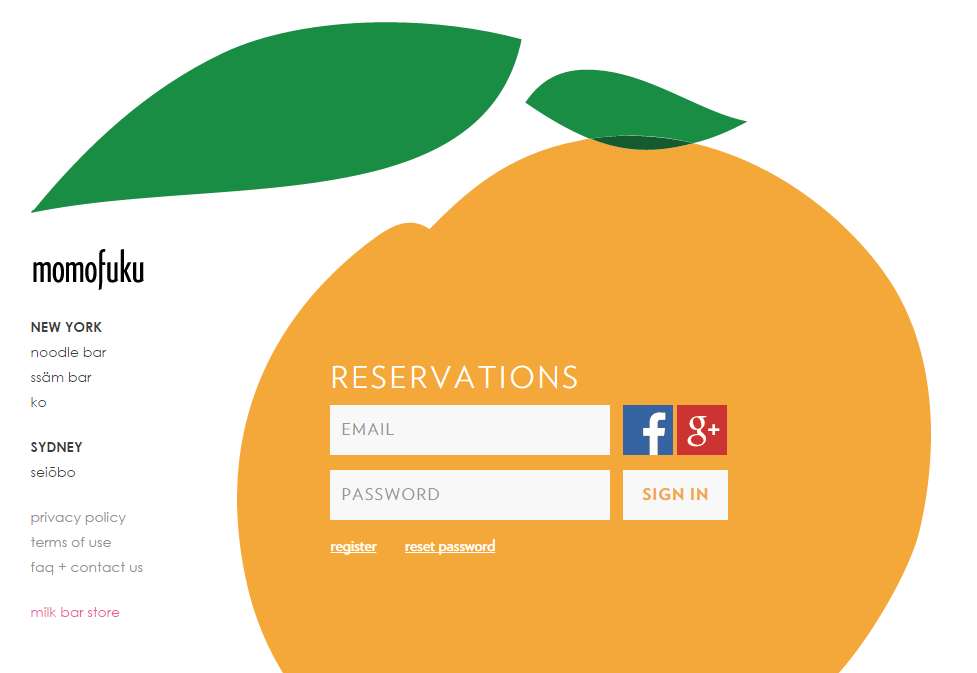
The first step was to have a look at how the reservation site worked. The interface was a snazzy AJAX-based multi-step wizard with fancy animations (which always makes me a bit worried when trying to automate things).
My initial thought was to use a browser automation tool like phantomjs or casperjs – but that turned out to be way too complicated and would have meant writing complicated code for wait and test logic.
So instead I started looking at how the application actually worked. Turns out their application has a nice AJAX-based API for stepping through the wizard steps. Nice!
Step 3 – Getting started
Alright, so let’s start coding something. My go-to platform these days is node.js – it’s an amazing platform to work with and has a ton of great packages for everything. The obvious package requirements were:
// simple http requests
var request = require("request");

// parse and manipulate html with jquery style selectors
var cheerio = require("cheerio");

// a must for any node.js project
var async = require("async");
Tip, npmsearch.com is a great tool for finding highly rated packages.
Step 4 – Logging in
The first step was to get the login working. It was a simple HTML form with a username and password field – except they use an authenticity token generated by server embedded into the page. Namely, I couldn’t just POST the form data without first fetching the login page.
// get the login page
request.get({ url: LOGIN_URL }, function (err, resp, body) {

  // parse html body with cheerio and extract auth token
  var $ = cheerio.load(body);
  var CSRF = $("meta[name=’csrf-token’]").attr("content");
  HEADERS["X-CSRF-Token"] = CSRF;

  done();
});
Once I had the token it was just a matter of POSTing the form data with my login details and the authenticity token.
var form = {
  utf8: "✓",
  _method: "patch",
  authenticity_token: HEADERS["X-CSRF-Token"],
  "user[email_address]": USERNAME,
  "user[password]": PASSWORD,
  "commit": "SIGN IN"
};
request.post(
  { url: LOGIN_URL, form: form },
  function (err, resp, body) {
    done(err);
  }
);
Great, “I’m in”.
Step 5 – Making my selections
The next step was to actually select all of my preferences for the reservation. The reservation system works across all momofuku restaurants, and the process goes like this:
-
Where do you want to make a reservation
-
For how many people
-
Where do you want to be seated
-
What time slot do you want
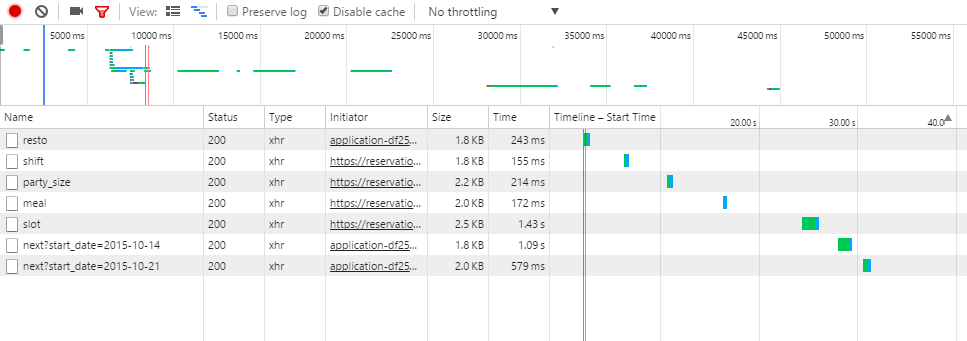
Essentially, each step POSTs data back to their server with new selections. By simply recording the network traffic while I made my selections I could see exactly what fields and values I would have to POST. Oh, and rather than posting them individually I assumed that I could just POST them all at once (which in fact worked).
var form = {
  utf8: "✓",
  _method: "patch",
  authenticity_token: HEADERS["X-CSRF-Token"],
  "reservation_form[restaurant_id]": "4", // momofuku ko
  "reservation_form[party_size]": "2",    // 2 people
  "reservation_form[meal_id]": "7",       // dinner/counter?
  "reservation_form[shift_id]": "8"       // no sure...
};
request.post(
  { url: CURR_URL, headers: HEADERS, form: form },
  function (err, resp, body) {
    done(err);
});
Step 6 – Fetching time slots
Alright, now to the good part. Once I had made my selections I had to fetch the information about available time slots. Turns out I was able to request slot information for 7 days starting with any given date!
https://reservations.momofuku.com/reservations/<ID>/week/next?start_date=2015-10-09
Unfortunately I had to somehow figure out a reservation ID. At first I though it was a constant ID associated with my account, but it turned out that the ID changed – presumably once my session timed out. However, the initial landing page with time slots contains links to traverse the weeks, so I just extracted the ID from there.
request.get(
  { url: SLOT_URL, headers: HEADERS },
  function (err, resp, body) {

    // check if reservations closed
    if ($("#closed-reservations").length > 0) {
      return done("reservations closed");
    }

    // extract reservation id
    ID = $("a.next").attr("href").split("/")[2];
    done();
});
Oh, and I also had to check if the reservation system was actually “open” since reservations can only be made after 10 AM EDT.
Step 7 – Parsing time slots
Now to the tricky part. Time slot data was not returned in JSON format (which would have been nice). Rather, it was HTML containing the status for all time slots for all days during the 7 week period. Once again, cheerio to the rescue.
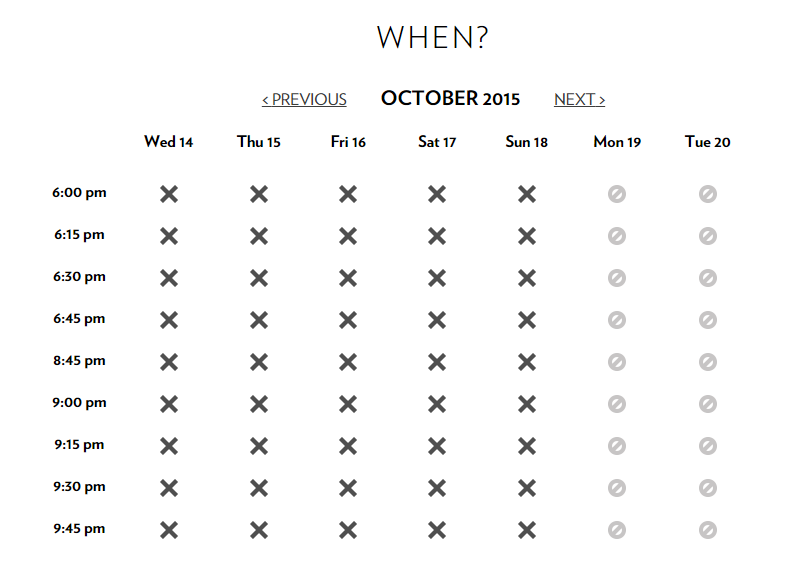
The process goes something like this:
1. Loop through all rows
2. Extract dates from columns in the first row
3. Loop through columns in remaining rows
4. Extract time slot status for each date/time
5. An "img" tag means the slot is unavailable
   An "a" tag means the slot is available
Step 8 – Putting it all together
The great thing about async is that it makes writing node.js programs super easy (asynchronous code that’s actually easy to understand). One of my favorite functions for sequential logic is async.waterfall. The great thing about it is that if any step returns an error then the waterfall terminates and the error is handled at the bottom. Super useful!
async.waterfall([
  // GET LOGIN
  function (done) { … },
  // POST LOGIN
  function (done) { … },
  // GET MAIN
  function (done) { … },
  // POST SELECTIONS
  function (done) { … },
  // GET SLOT
  function (done) { … },
  // GET SLOTS
  function (done) { … }
], function (err, res) {
  // handle error or result!
});
Also, for each date I return an array of any available slots. async.concatSeries makes it simple to check all of the dates for my trip and return them as one array (I’m being optimistic here assuming that I’ll actually have a choice of more than one slot).
var dates = [ "2015–10–12", "2015–10–19", "2015–10–27" ];
async.concatSeries(dates, function (done) { … });
Step 9 – Getting notifications
Now I had an array of any available time slots. I just needed a simple effective way to receive notifications once I made the program run automatically. Sure, I could send an email notification (but that’s boring). Also, I wanted something that would be sure to wake me up if something happened at night in Sweden (yes, I’m that eager!)
Hmm, SMS would be fun. Or better yet, why not a phone call. I signed up for a trial account at twilio.com and while they don’t offer SMS services in the trial account in Sweden, I was able to make a demo phone call to my number. Perfect. (Oh, and of course there’s a node package for twilio.)
var twilio = require("twilio")(SID, AUTH);
twilio.makeCall({
  from: 'my twilio number',
  to: 'my phone number',
  url: 'http://ahoy.twilio.com/voice/api/demo'
}, function (err, responseData) {
  if (err) console.log(err);
});
Unfortunately I wasn’t able to change the text spoken when I received a call. It would have been awesome to actually have it tell me the time slots available. In any case, it was fine as long as I was able to trigger a phone call.
Step 10 – Running it
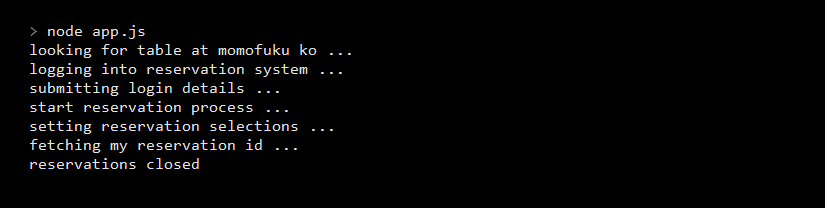
Finally, I just had to run the program automatically, but also respecting that I probably shouldn’t run it too often… A simple Jenkins job that runs the program every once in a while should do the trick!
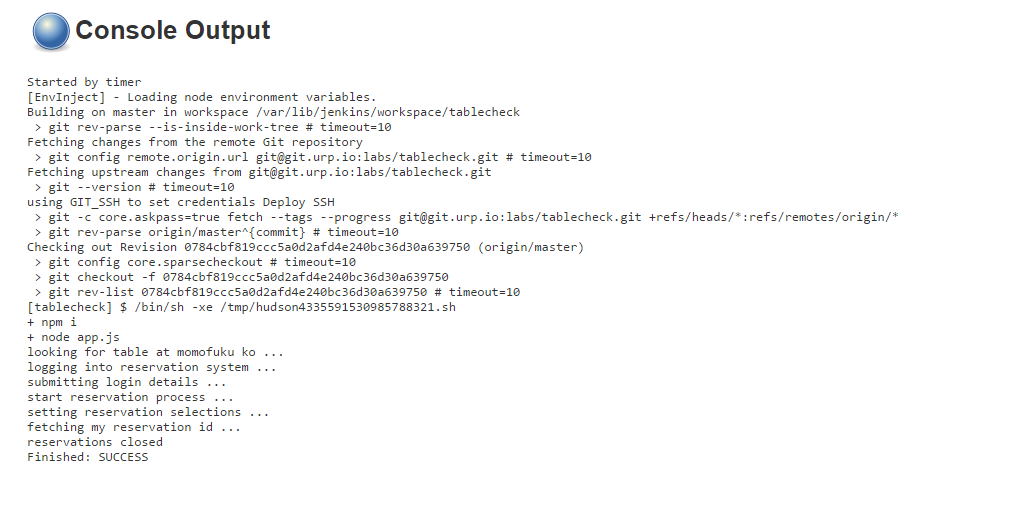
All done :)
193 lines of code in a couple of hours – well worth the effort.
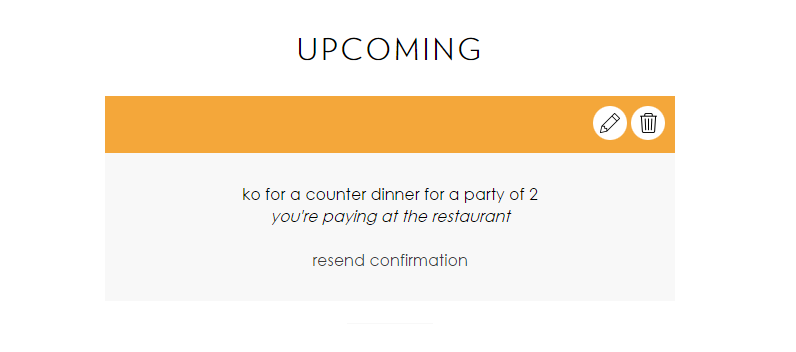
If it’s worth doing, it’s worth overdoing
Just before publishing this story my phone rang – guess what, my program found an open slot :)
Resources:
- https://nodejs.org/en/
- https://github.com/cheeriojs/cheerio
- https://github.com/caolan/async
- https://github.com/request/request
- https://www.twilio.com
Source Code: pqvst/tablecheck